Configuring the OOTB Reset Password Screen for Sitefinity
sitefinity | 2022-12-20
💡 Introduction
In this guide, I will walk you through configuring the Out-of-the-Box (OOTB) reset password screen for Sitefinity CMS, tested and successfully running on versions v13.3 and v14.4.
This process involves different workflows depending on whether you are configuring the reset password functionality for a public user or a backend dashboard admin user.
This article will focus specifically on the backend dashboard admin user configuration.
🚩 Problems / Issues
Previously, we discussed some common issues with Sitefinity's reset password screen here.
This article aims to address those problems by showcasing a step-by-step guide to correctly configure the reset password screens in Sitefinity.
The configuration process differs between v14+ and v13 or below, and it’s important to understand the nuances to successfully implement the solution.
⚙️ Pre-requisite for the Solution
-
Enable Password Reset
Set Security > Membership Providers > Default > Parameters > enablePasswordReset to true.
Don't forget to restart Sitefinity core after updating the configuration.

-
Set Up SMTP Profile
Ensure that you have configured an SMTP profile to send email notifications for password reset requests.
🔥 Solution for v14+ with .NET Core Renderer
1. Create a Page for Password Reset
To begin the configuration, create a page dedicated to the password reset functionality.

2. Choose Between Using OOTB Templates or Customizing Them
-
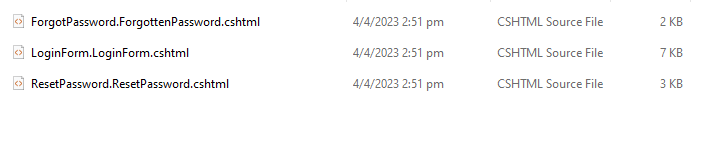
Option A: Use the Out-of-the-Box (OOTB) Templates
Sitefinity provides built-in templates for login, reset password, and change password forms.
-
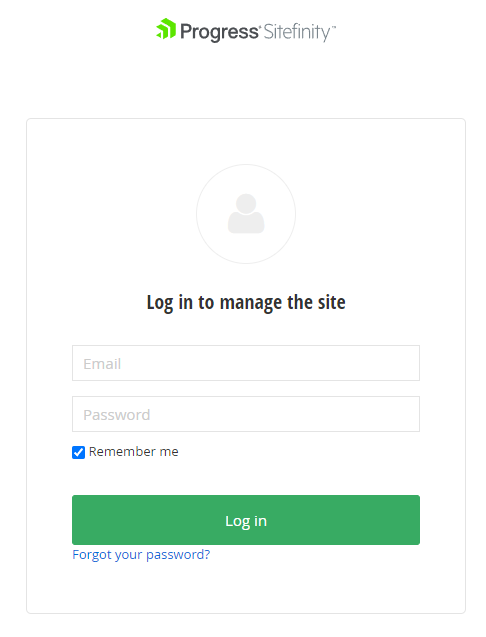
Login Form
-
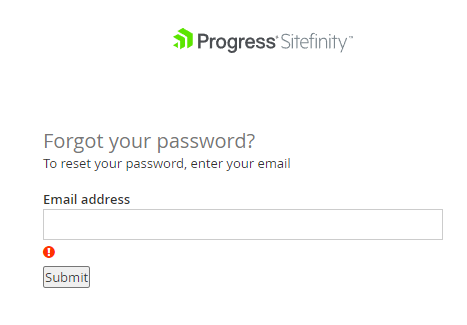
Reset Password Form
-
Change Password Form
-
-
Option B: Customize the Templates
If you want to customize the templates, you can download them from GitHub:
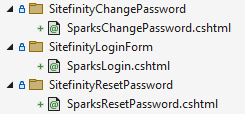
3. Clone and Name the Project
Clone the relevant templates to your Sitefinity project. For organizational purposes, you can name it something meaningful like Sparks.
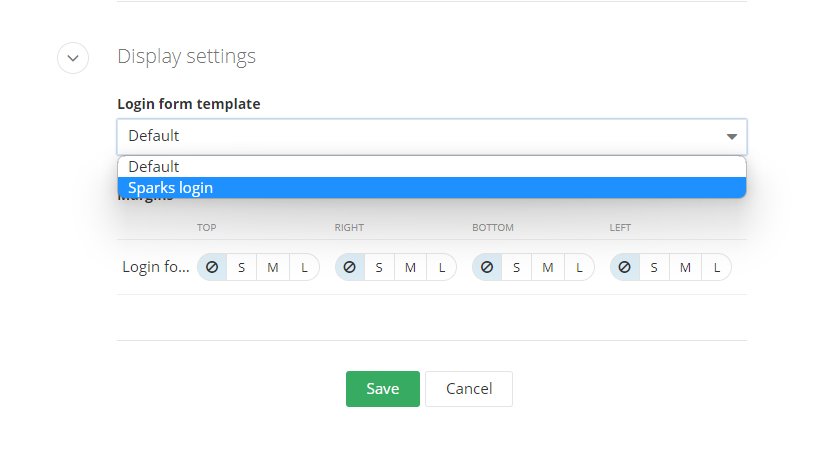
4. Deploy the Widget and Override the Template
Deploy the widget and select the Override Template option during the deployment process.
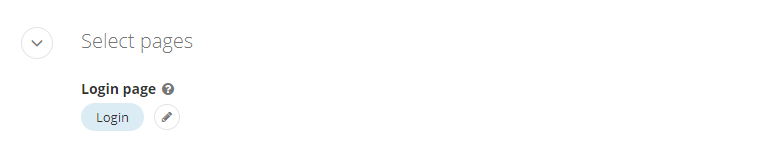
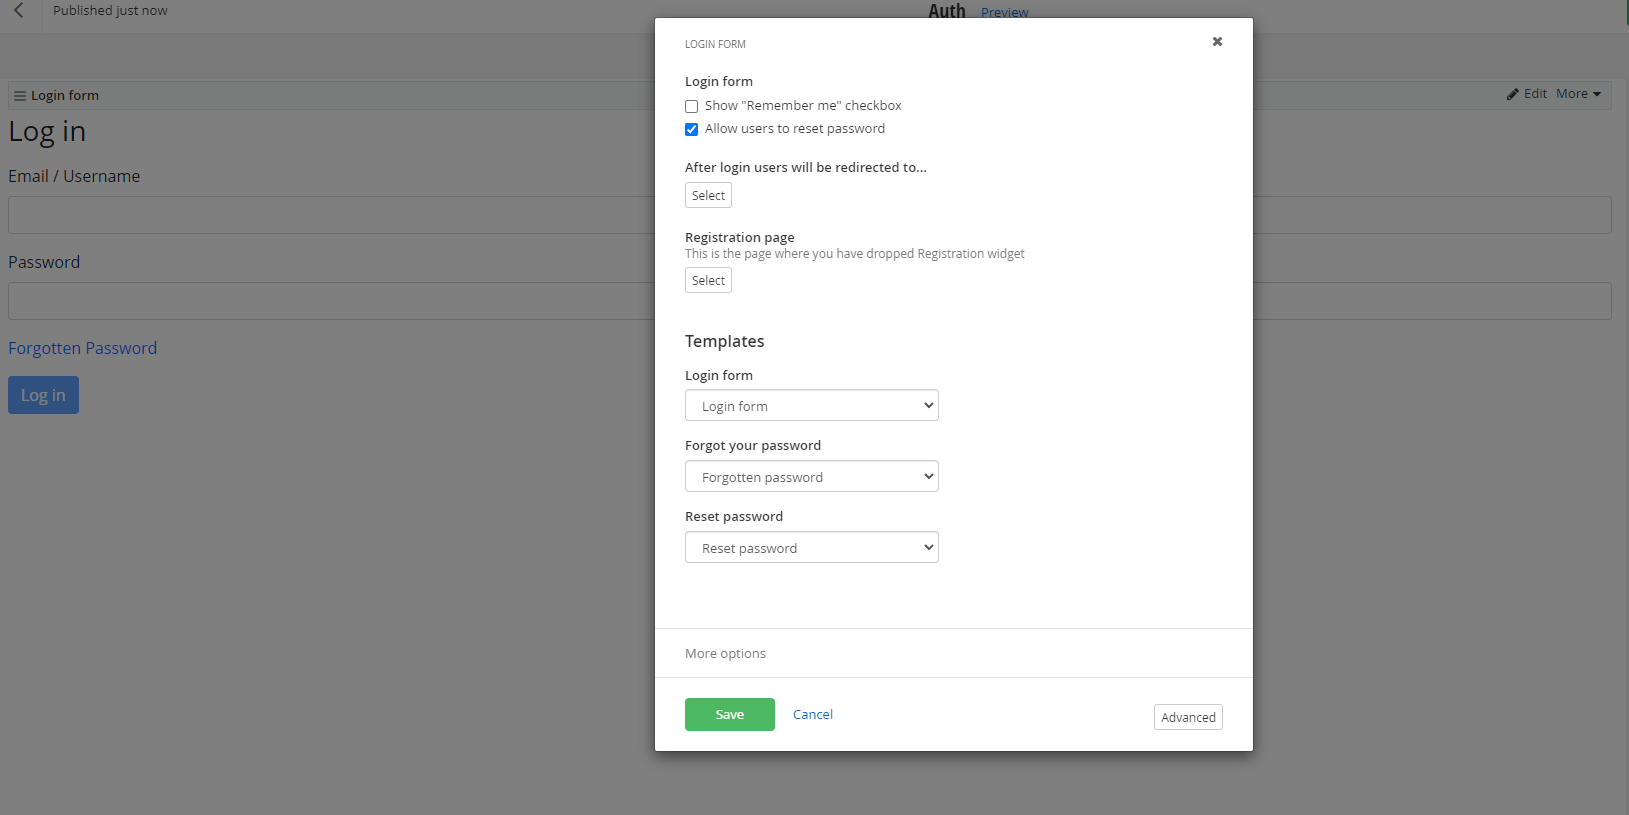
5. Edit the Login Page for Authentication
Navigate to /Sitefinity/Administration/BackendPages/Pages, then edit the login page under the Authentication section.

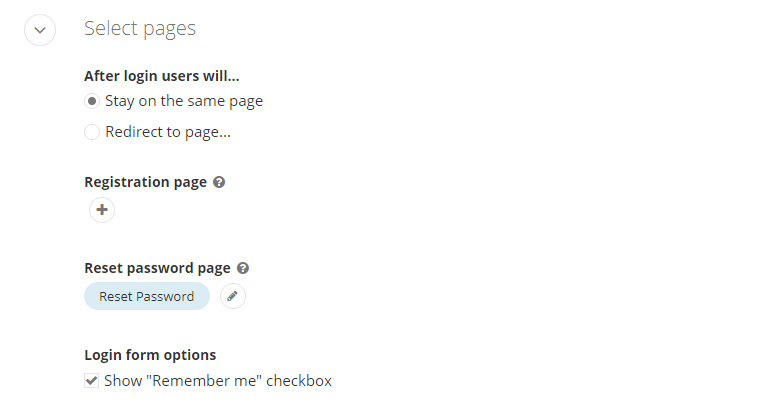
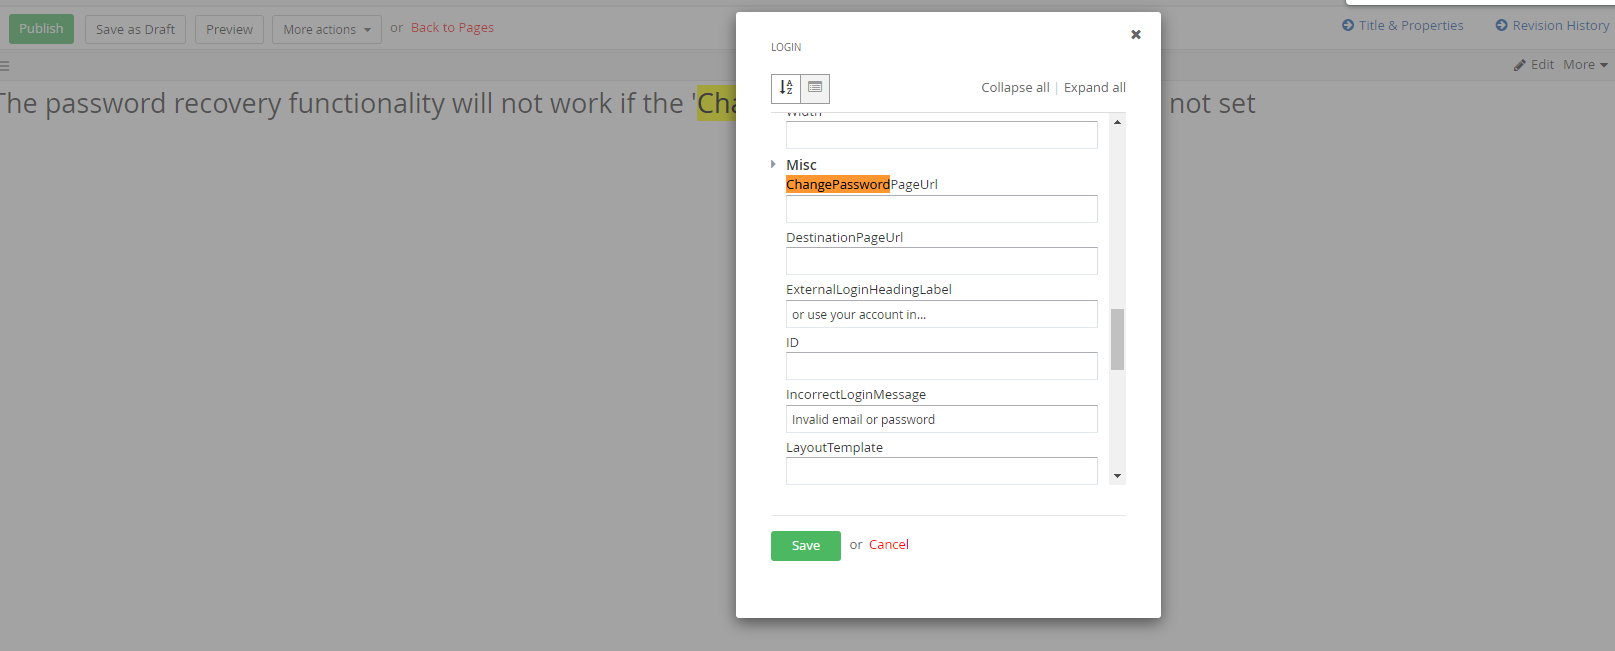
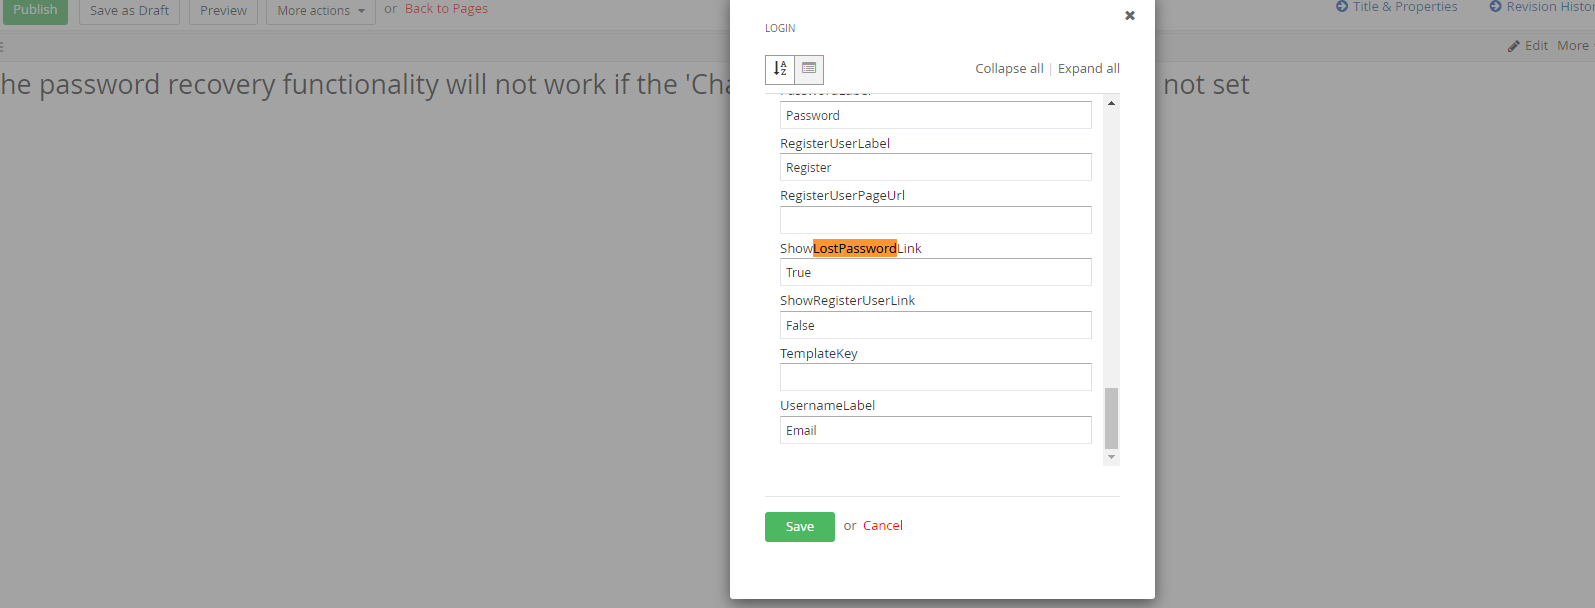
6. Update the Reset Password URL and Display the "Forgot Your Password?" Link
Update the ChangePasswordPageUrl to point to the page created in Step 1. Set ShowLostPasswordLink to True to display the "Forgot your password?" link.
7. Visit the Login Page
Once the configuration is complete, visit your Sitefinity login page. You should now see the "Forgot your password?" link.
8. Follow the Reset Password Flow
Click the link to navigate to the Forgot Password screen, enter your email, and submit the request.
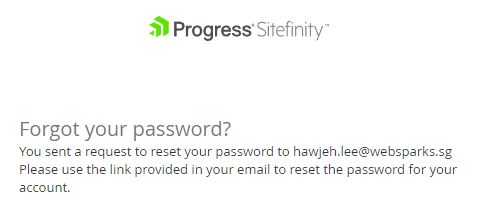
9. Receive an Email with Reset Instructions
After submitting the request, you will receive an email with a link to reset your password.
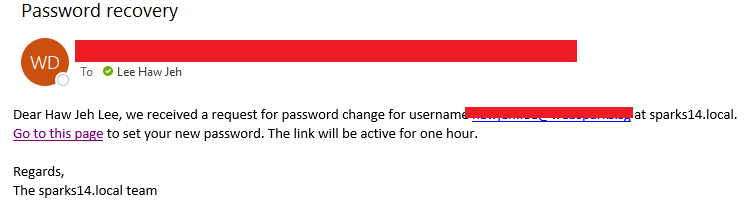
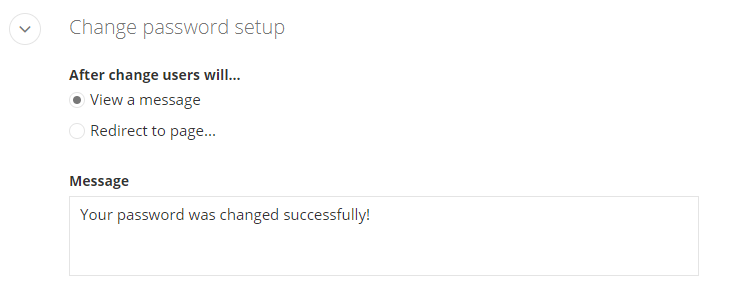
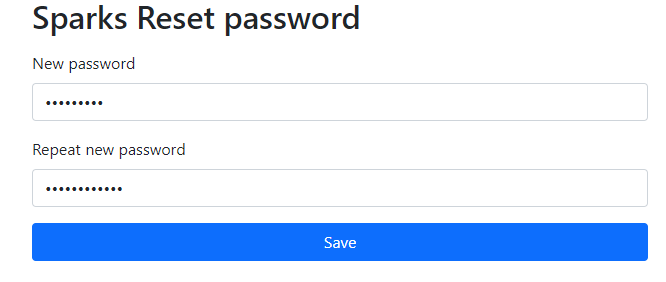
10. Reset Your Password
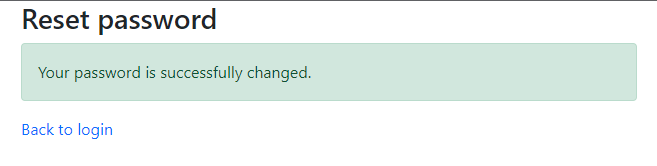
Click the link in the email, enter a new password, and see the Password Changed Successfully screen.

11. Customizing the Email Template
If you wish to customize the email template used for the reset password functionality, you can refer to the official documentation here.
🔥 Solution for v13.3 with Bootstrap 4 or 5
1. Create the Reset Password Page
Choose a Bootstrap 4 or 5 page template and install the Login Form widget. Mark the option to allow users to reset their password.
2. Retrieve the Forget Password URL
After publishing the page, retrieve the forget password URL, for example: http://<domain>/auth/resetpassword.
(Note: Make sure to include /resetpassword at the end of the URL for the multi-views widget.)
3. Edit the Login Page
Navigate to /Sitefinity/Administration/BackendPages/Pages and edit the login page under the Authentication section.
4. Update the Reset Password URL
Update the ChangePasswordPageUrl and set ShowLostPasswordLink to True.
5. Test the Reset Password Link
Publish the page and visit /Sitefinity/Login.
You should now see the Forgot your password? link.
6. Submit the Request
Click the link and submit the password reset request.
7. Receive the Reset Email
You will receive an email with instructions to reset your password.
8. Reset Password
Click the link in the email, enter a new password, and see the password change confirmation screen.
9. Customize Email Template URL
Optionally, you can also customize the email template URL to ensure the correct link is used.