Integrating OpenAI with Sitefinity CMS
sitefinity | 2023-11-20
⚙️ Prerequisites
Ensure that you have the following before proceeding:
- Sitefinity CMS 15.0+ (or higher)
- Progress.Sitefinity.AIServiceConnector NuGet package installed
- Azure Subscription with appropriate permissions
☁️ Setting Up Azure OpenAI
Follow these steps to configure Azure OpenAI for integration with Sitefinity:
1. Access Azure Portal
Go to the Azure Portal and log in with your Azure credentials.
2. Create a Resource Group
Create a new Resource Group within your Azure Subscription to organize your OpenAI resources.
3. Create an OpenAI Service
Within the resource group, create a new Azure OpenAI service.

4. Search and Select OpenAI
In the Azure Marketplace, search for "OpenAI", select Azure OpenAI, and create the service.

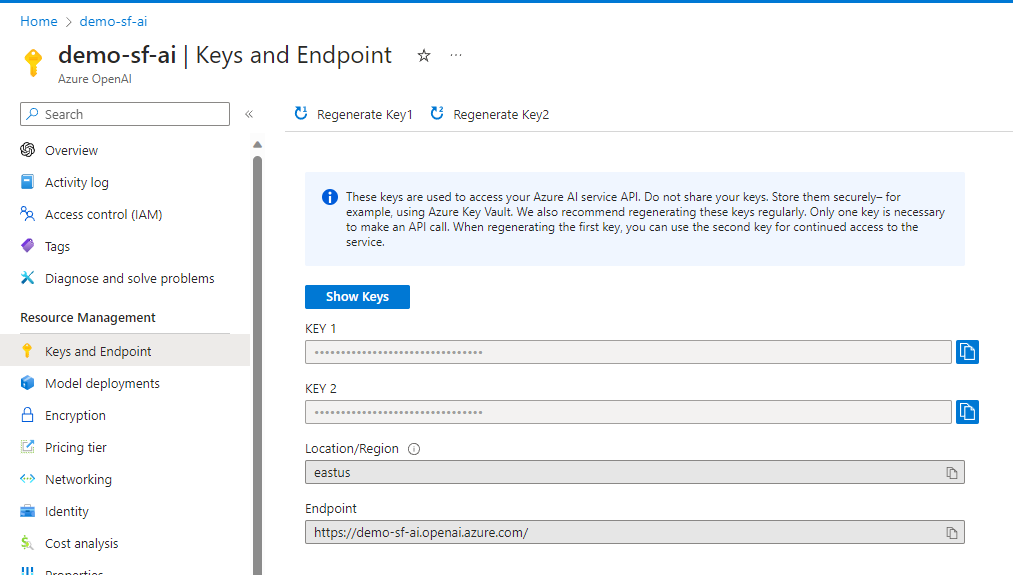
5. Obtain API Keys and Endpoint
Navigate to Keys and Endpoints in the Azure OpenAI service. Save either KEY 1 or KEY 2 and the Endpoint for later use.
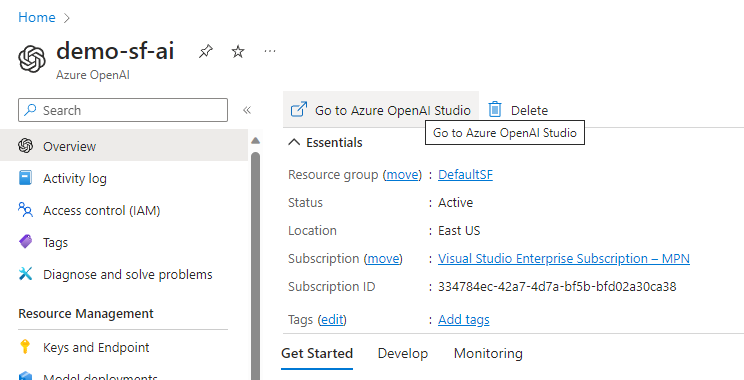
6. Access Azure OpenAI Studio
In the Overview section, click Go to Azure OpenAI Studio to start configuring your OpenAI models.
7. Create a Deployment
In the Azure OpenAI Studio, create a new Deployment and select the gpt-35-turbo model. Set a Deployment Name.
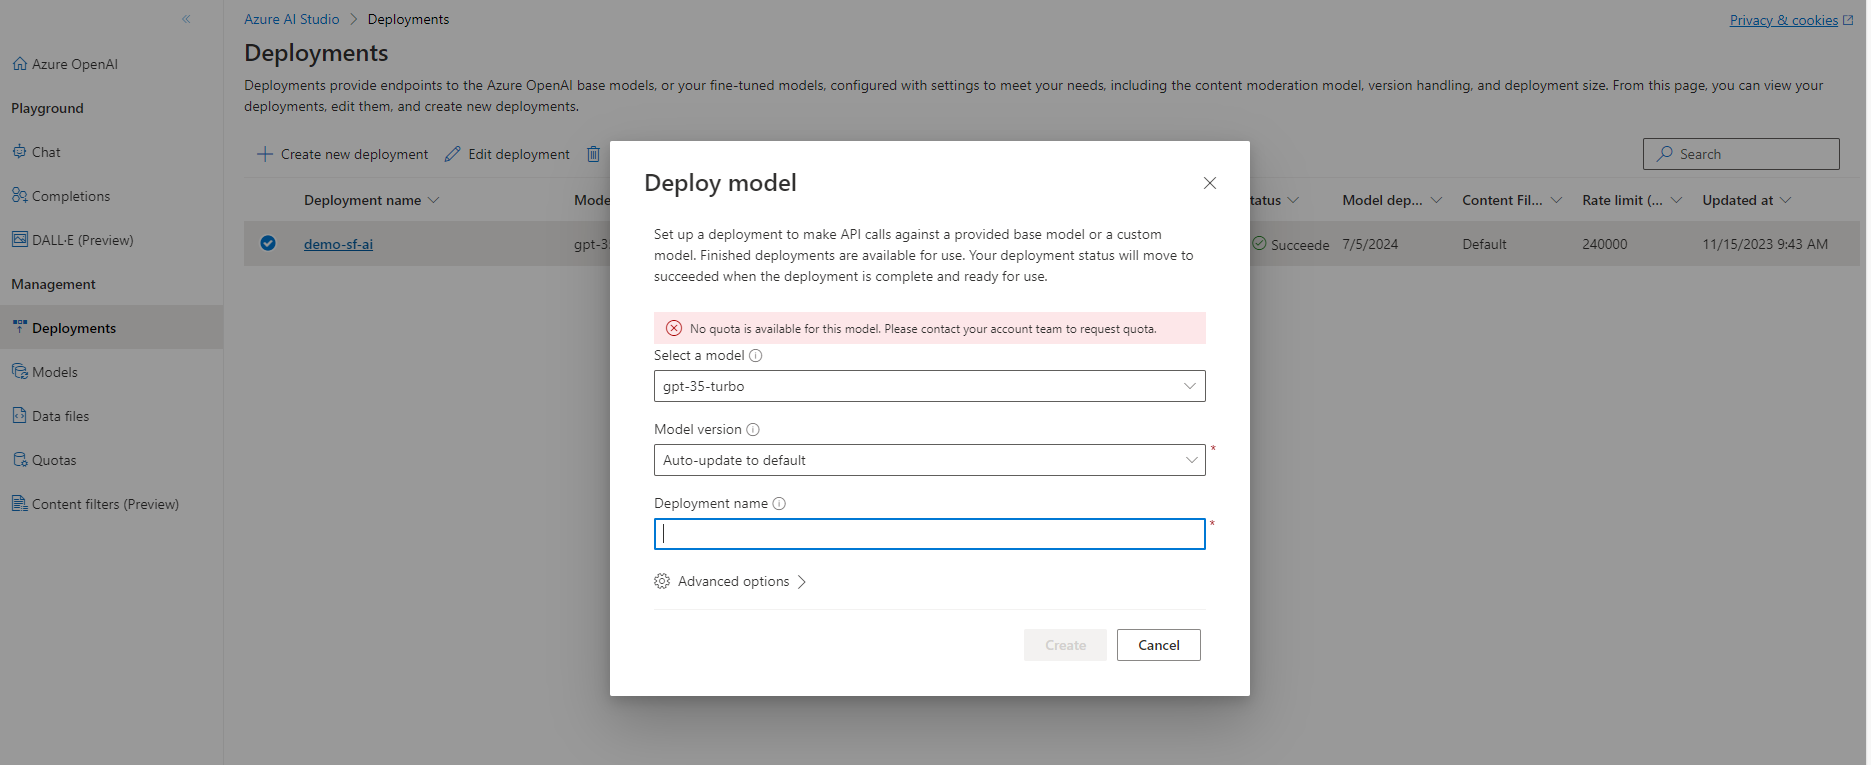
8. Save the Deployment Name
Remember the Deployment Name as it will be required for Sitefinity configuration.
🏗️ Configuring Sitefinity
1. Install the AIServiceConnector NuGet Package
In your Sitefinity project, install the Progress.Sitefinity.AIServiceConnector NuGet package to enable AI service integration.
2. Log in to Sitefinity CMS Dashboard
Log into your Sitefinity CMS Dashboard, and navigate to Administration → Modules & Services.
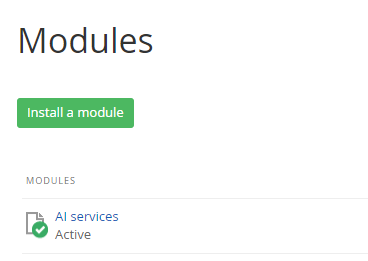
3. Install AI Services
Install the AI Services module in Sitefinity to enable AI functionalities.
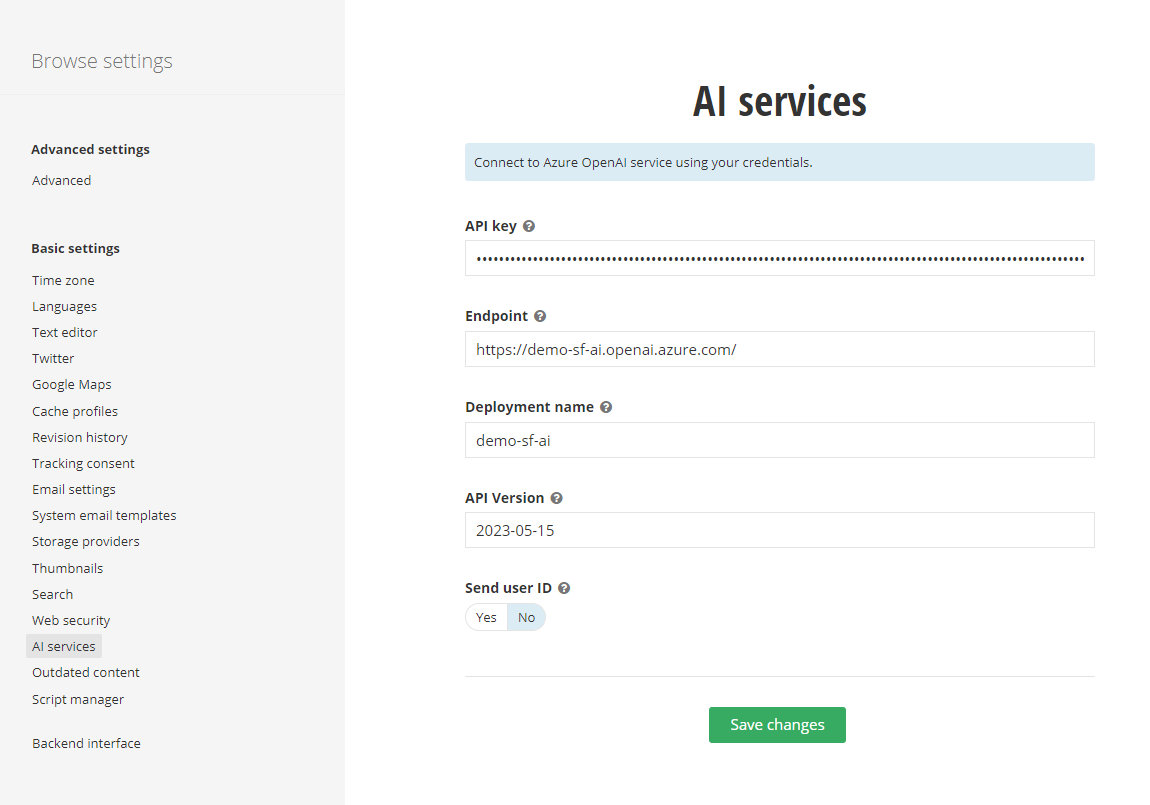
4. Configure AI Services
Go to Administration → Settings → AI Services to configure the API keys and endpoints:
- API Key: Use either KEY 1 or KEY 2 from Azure (Step 5 above).
- Endpoint: Use the Endpoint provided by Azure.
- Deployment Name: Enter the Deployment Name from Azure.
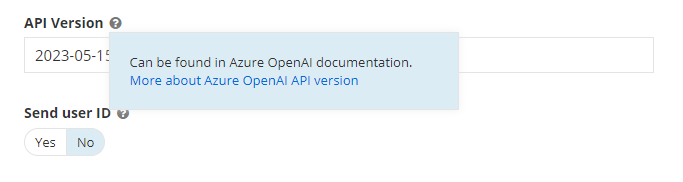
5. Set API Version
Check the stable API Version by clicking the question mark tooltip. In this demo, we are using version 2023-05-15.
6. Save and Restart
Save your changes and restart the Sitefinity instance to ensure the configuration is applied correctly. (Restart is required for proper integration).
📱 Sitefinity OpenAI Integration Demo
1. Create a Content Block
Log into Sitefinity CMS, navigate to Content → Content Blocks, and create a new content block.
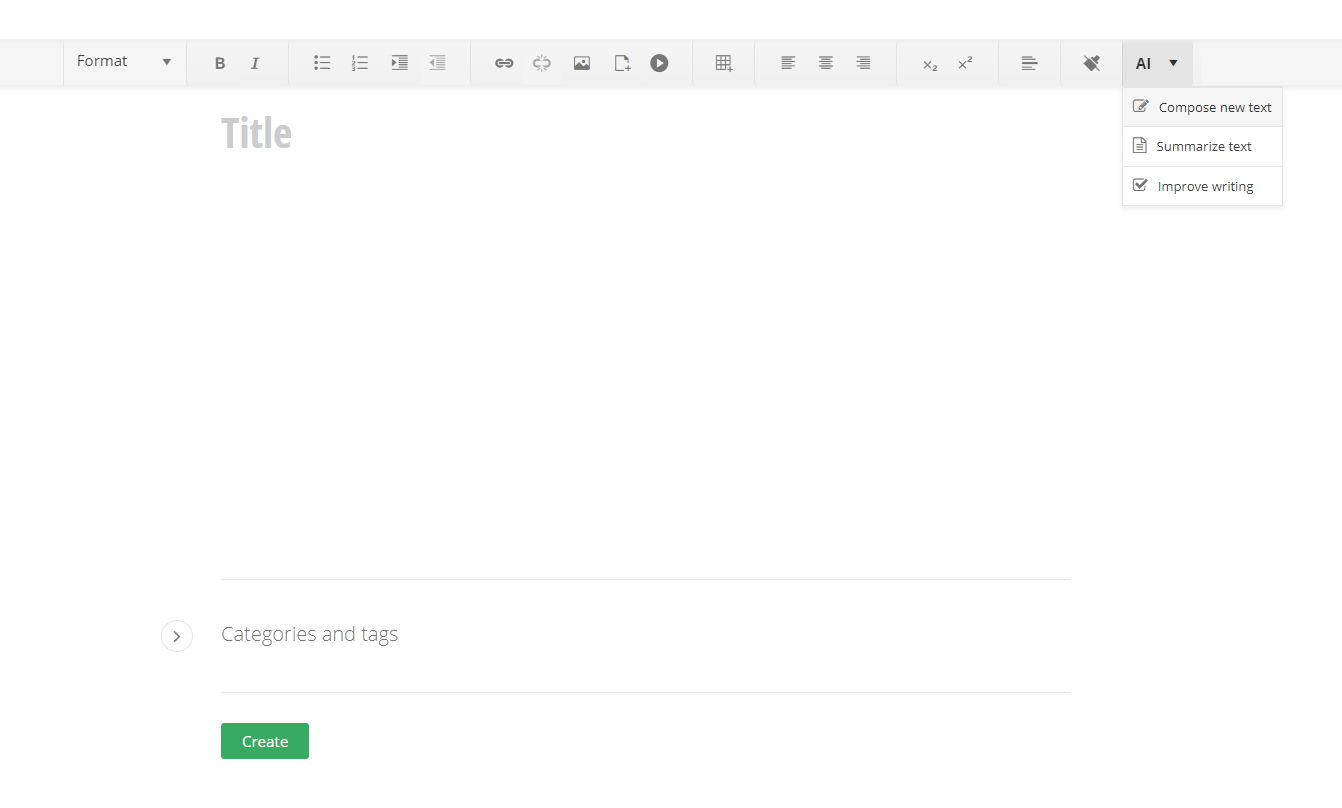
2. Open the Content Editor
In the content editor, you will see an AI button that enables the integration of OpenAI.
3. Available AI Features
The AI button supports three key options:
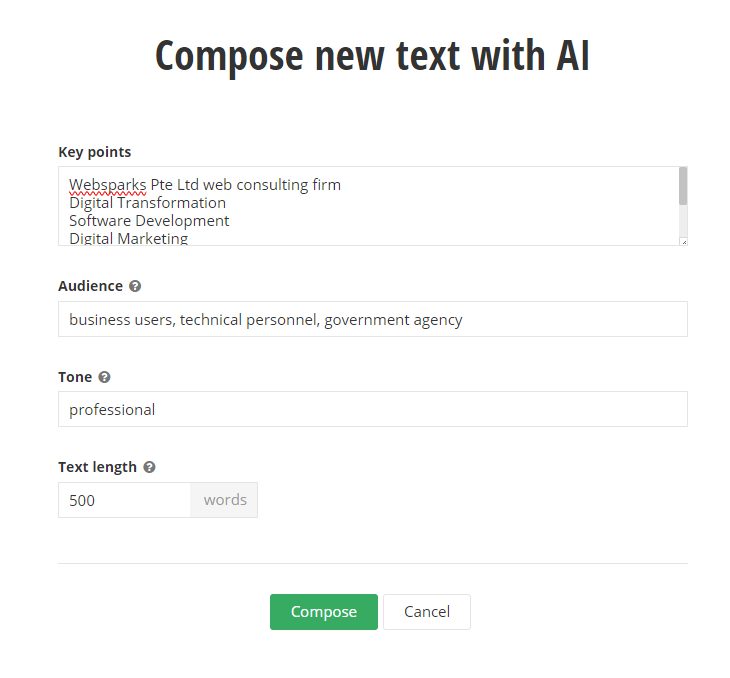
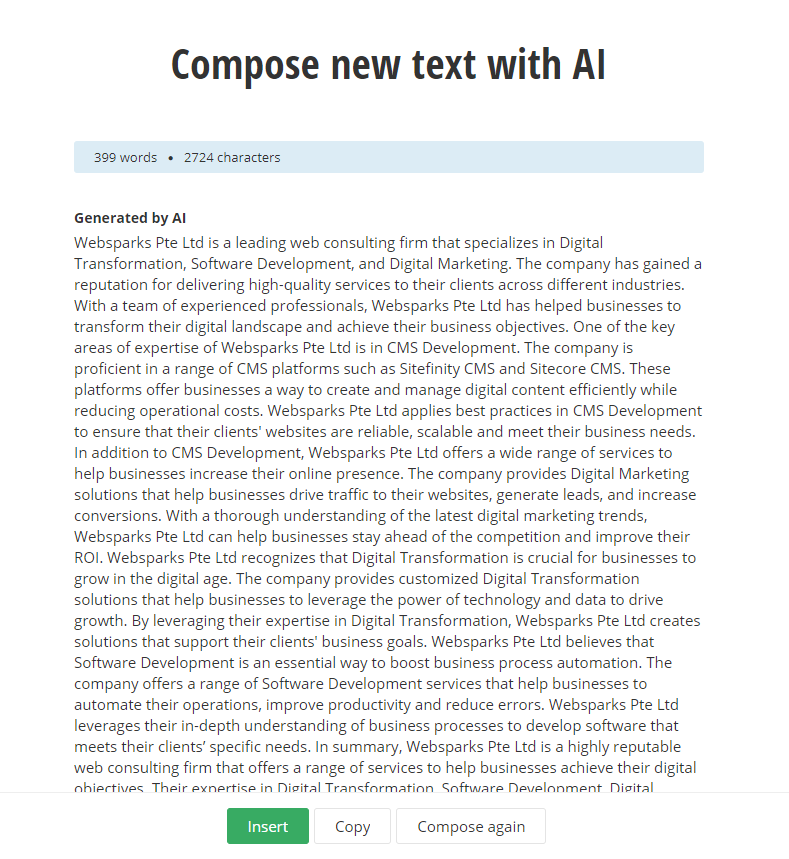
4. Generate Content
Select Compose new text, provide the necessary details, and let the AI assist in generating content.
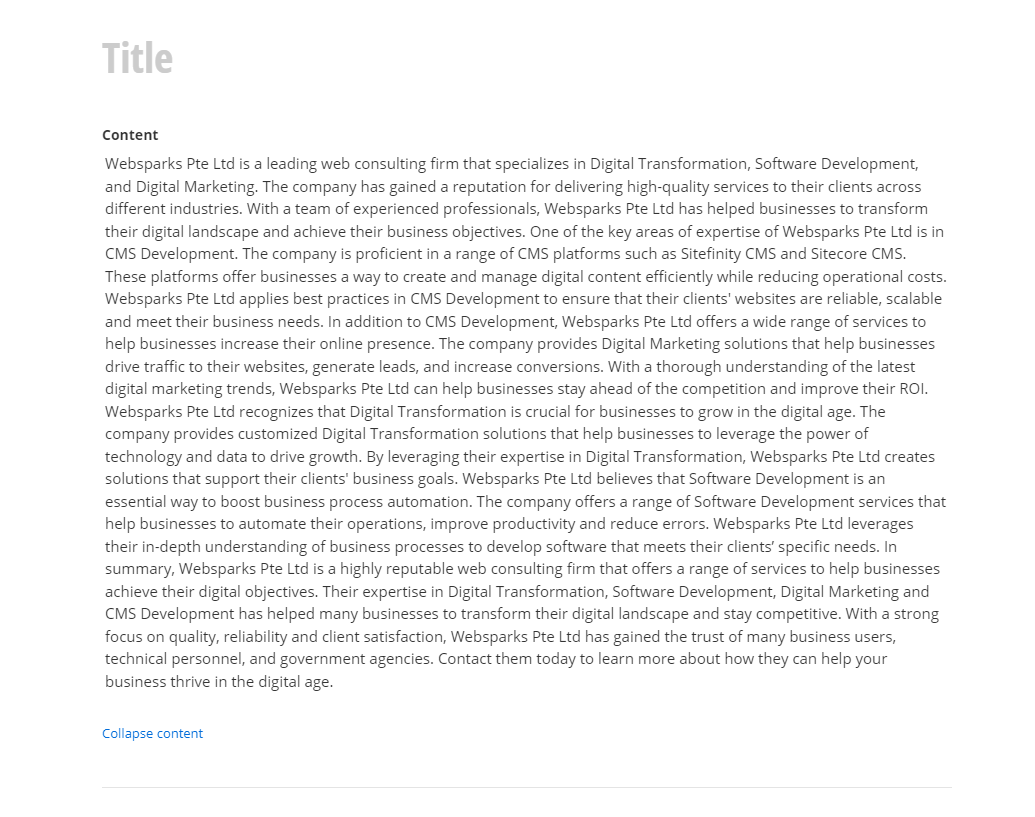
5. Insert or Modify Content
Once the content is generated, you can insert it into your content block or modify it further as needed.
6. Generate Tags with AI (Sitefinity 15.1)
In Sitefinity 15.1, you can also generate tags for content using AI. For example, the article on Sport Singapore launches fairer facility booking platform is tagged using AI.
7. Generate Tags with AI
Click the "Use AI" icon next to the tags section, and the AI will generate relevant tags for your content.

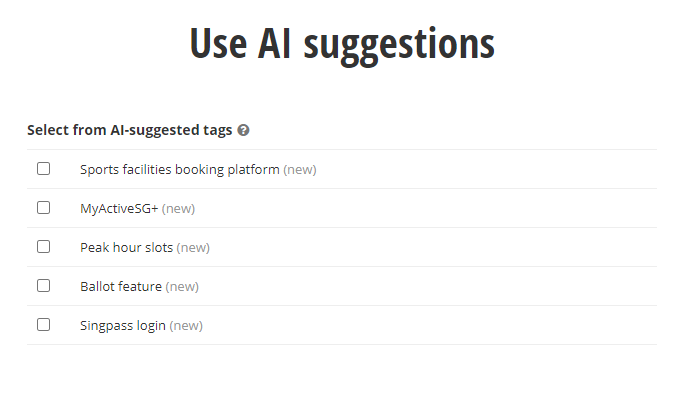
8. Save and Review Generated Tags
Once you save, you’ll see the new AI-generated tags attached to the article.
