Sitefinity Configuration XDT Transformation
sitefinity | 2024-03-20
⚙️ Pre-requisite
Before you begin, ensure you have installed the Slow-Cheetah NuGet package:
🚀 Here We Go: Step-by-Step Guide
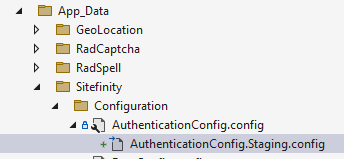
Step 1: Locate the Configuration Folder
In Visual Studio, navigate to the App_Data → Sitefinity → Configuration folder.
Note: If this folder is not already included in the Visual Studio project, make sure to add it.
Step 2: Create a New Configuration File
Create a new configuration file that needs transformation. The file should follow the naming convention:
<ConfigName>.<Stage>.config (Ex. PagesConfig.Staging.config)
Step 3: Set File Properties
Right-click the newly created file and select Properties.
Set the Build Action to Content.
Step 4: Install Slow-Cheetah
Ensure you have installed the Slow-Cheetah NuGet package in your project.
Step 5: Add the Transformation File
Add a transformation file for the configuration. For example, Authentication.Staging.config.
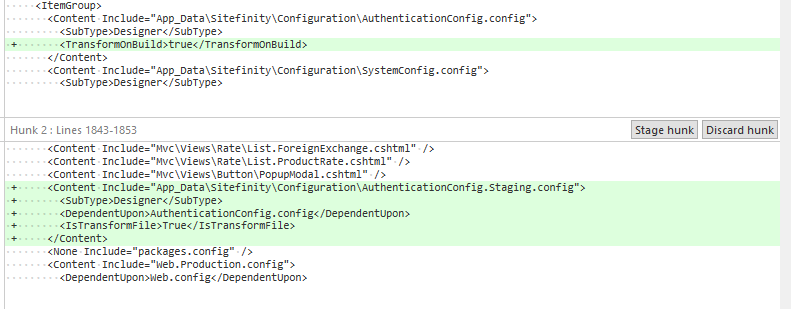
Step 6: Verify .csproj File
Check your .csproj file to make sure the root config (e.g., AuthenticationConfig.config) contains the following:
<TransformOnBuild>true</TransformOnBuild>
and the created AuthenticationConfig.Staging.config contains
<DependentUpon>AuthenticationConfig.config</DependentUpon>
<IsTransformFile>True</IsTransformFile>
Step 7: Publish with the Correct Build Configuration
Finally, publish the project with the appropriate build configuration (e.g., Staging, Production) to apply the transformation.