Sitefinity AWS CloudFront Invalidation
sitefinity | 2023-01-20
I have implemented a solution to:
- Intercept Sitefinity page publish events, and
- Trigger AWS CloudFront cache invalidation automatically.
This setup helps keep your CDN cache fresh without manual invalidation.
TL;DR: Sitefinity Page Publish Event → AWS CloudFront Cache Invalidation
☁️ AWS Setup
Before starting, make sure your CloudFront distribution is already up and running.
We will create a middleman IAM user to allow Sitefinity to trigger cache invalidations securely.
✅ Steps:
-
Create a Policy
cf-createinvalidation-policy- Allow action:
cloudfront:CreateInvalidation - Resources:
*(All distributions)
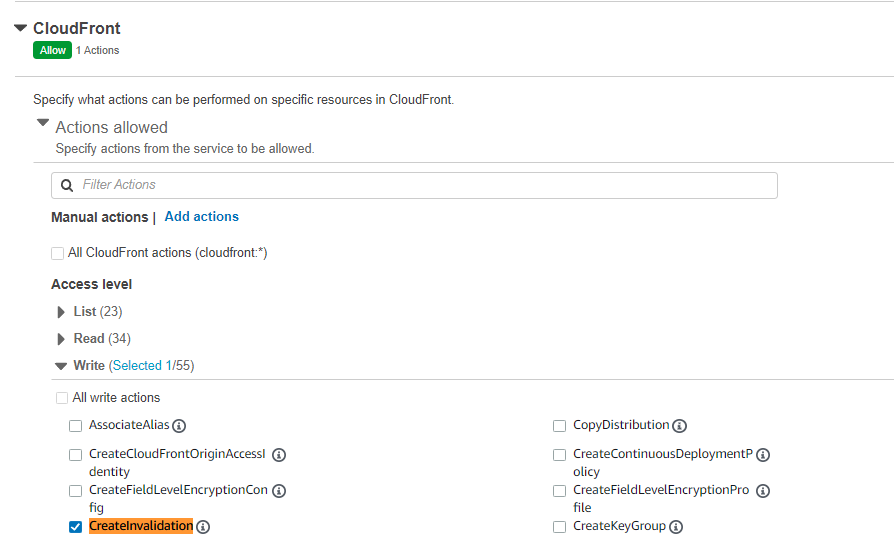
- Allow action:
-
Create a User Group
cf-usergroup- Attach the
cf-createinvalidation-policypolicy.
- Attach the
-
Create a User
cf-middleman- Add this user to the
cf-usergroup.
- Add this user to the
-
Generate Access Keys for
cf-middleman- Choose: Application running outside AWS
- Name it:
cf-sf - Save the Access Key ID and Secret Access Key safely.
-
Use the Access Keys in Sitefinity (details below).
🏗️ Sitefinity Setup
I built this as a separate external module — clean, plug-and-play — for any Sitefinity project.
You can follow Progress's guide to Create Widgets in External Assemblies (MVC).
✅ Steps:
-
In your
AssemblyInfo.csfile, add at the bottom:[assembly: PreApplicationStartMethod(typeof(SparksEventSubscriber), "Start")] -
Create two files in your module:
-
Create a configuration file named sparksSetting.json:
{ "CloudFront": { "Profile": "", "DistributionId": "", "AccessKeyId": "", "AccessKey": "" } } -
Build the project
-
For deployment, copy the following files to your Sitefinity project:
- AWSSDK.CloudFront.dll
- AWSSDK.Core.dll (if missing from destination)
- SparksCloudFront.dll
- sparksSetting.json
-
Configure your
sparksSetting.jsonwith your actual CloudFront credentials and distribution ID.
💡 Result
Once deployed:
- When you publish a page in Sitefinity,
- The system automatically submits cache invalidation requests to CloudFront,
- Ensuring the latest content is served globally.
📌 How to Upgrade or Adjust for Different Sitefinity Versions?
It is very simple:
- Open Manage NuGet Packages in Visual Studio.
- Change the package source to Sitefinity NuGet Source.
- Update the Telerik.Sitefinity.Core package to the desired version.