Azure AD SAML SSO Integration with Sitefinity CMS
sitefinity | 2023-10-20
The setup consists of 2 parts: Azure and Sitefinity.
Azure Entra ID configuration and custom code implementation in Sitefinity.
⚙️ Pre-Requisites
Before starting, ensure you have the following:
- Sitefinity CMS 14.4+ (Tested version)
- Hybrid .NET Core and MVC mode enabled (with Net Core Renderer and Progress.Sitefinity)
- Azure Subscription with appropriate permissions to manage Azure resources
- Roles setup in Azure to match the roles configured in Sitefinity CMS
☁️ Azure Configuration
Follow these steps to set up Azure Entra ID for integration with Sitefinity CMS:
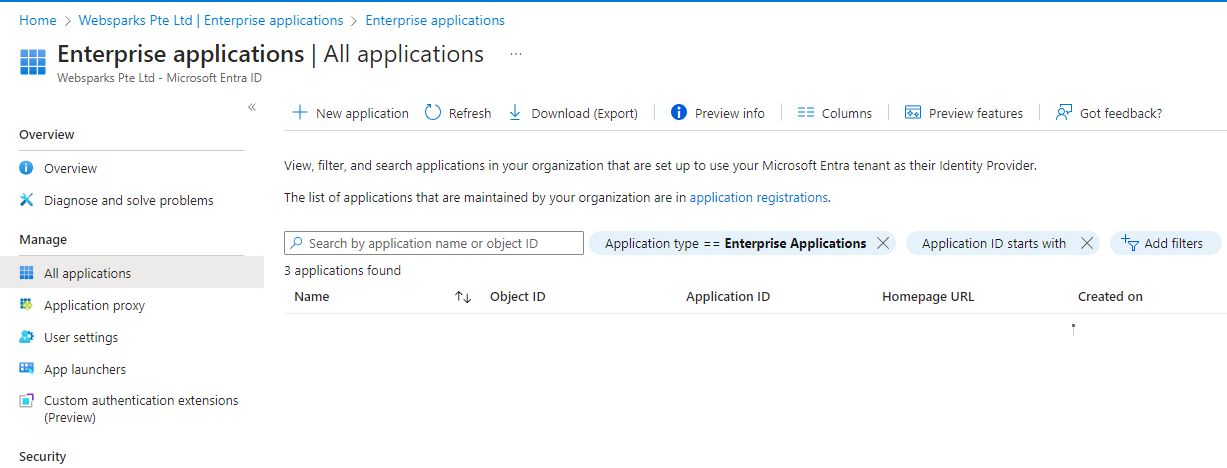
1. Access the Azure Portal
Go to the Azure Portal and sign in with your Azure credentials.
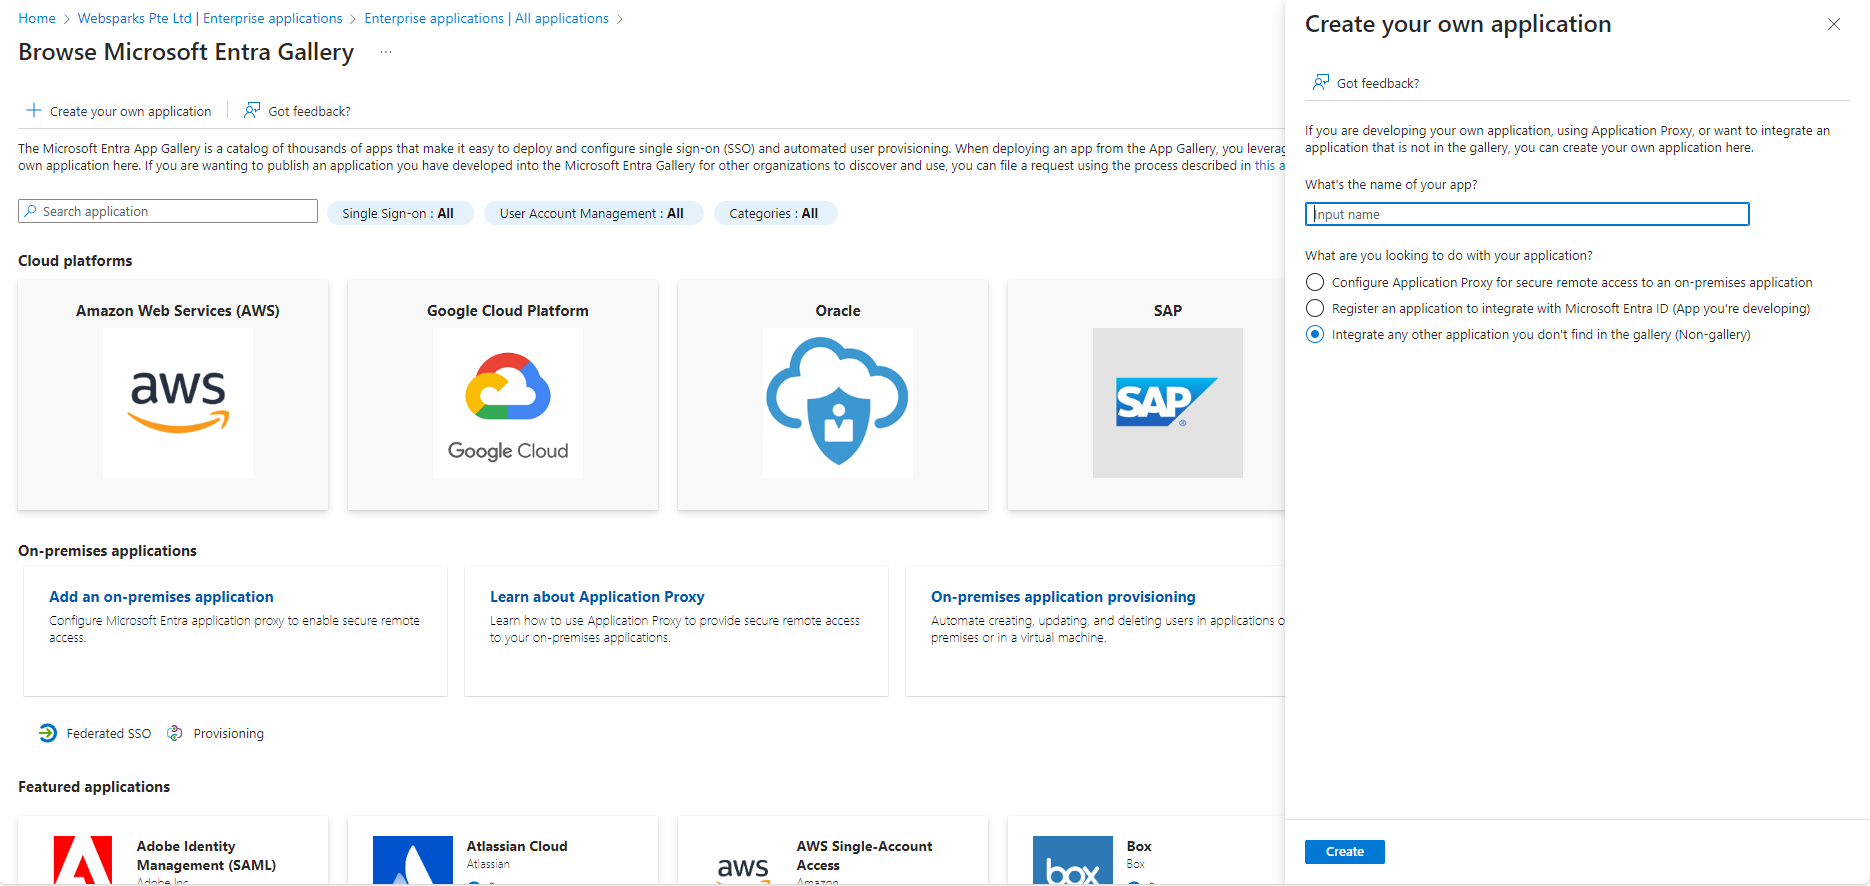
2. Create a New Application
Under Azure Entra ID, select Create Your Own Application and provide a name for the application.
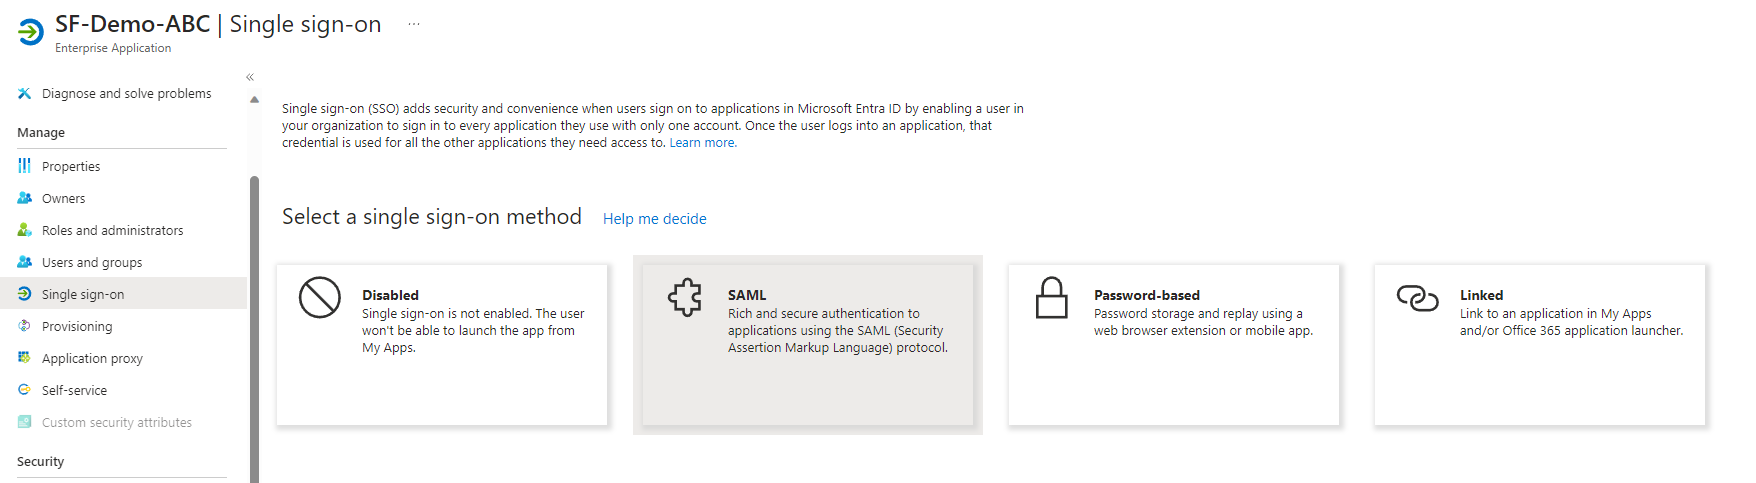
3. Configure Single Sign-On
In the application settings, configure Single Sign-On:
- Identifier: Set this to a URL such as
https://localhost:5001/Saml2. - Reply URL: Set this to
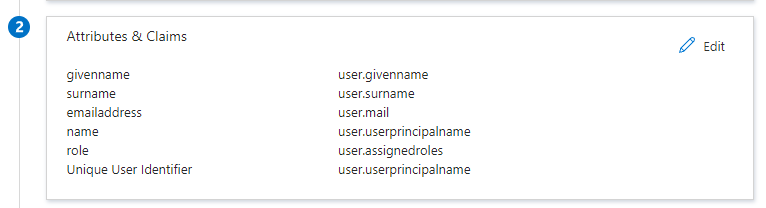
https://localhost:5001/Saml2/Acs. - Attributes & Claims: Adjust the necessary settings for your needs.
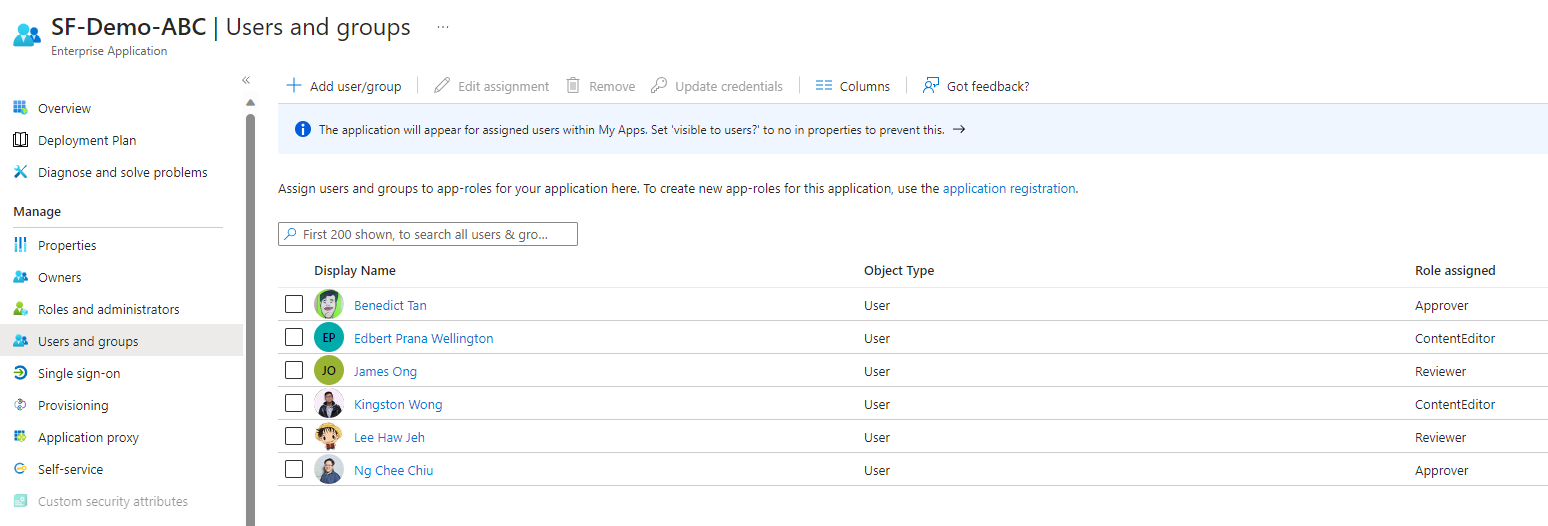
4. Add Users and Assign Roles
Under Users and Groups, add the users and groups that should access the application. Assign default roles to the users and groups.
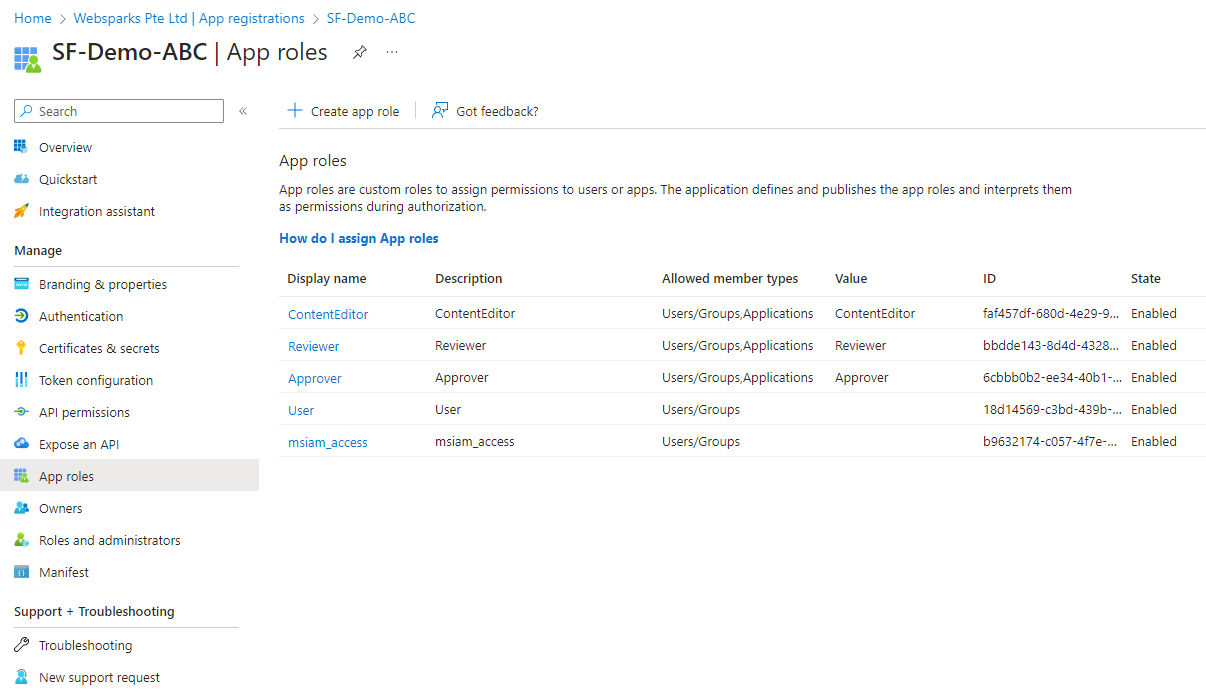
Under **Entra ID → App Registration → <Your Application> → App Roles**, create roles that match the roles defined in Sitefinity CMS.
Assign these roles to the users and groups.
🏗️ Sitefinity Configuration
1. Create a Custom Authentication Provider
To enable Azure SAML authentication in Sitefinity, start by creating a custom SAML authentication provider:
- SamlAuthenticationProvidersInitializer.cs
2. Update Global File in Sitefinity
Add the necessary code in Global.asax.cs and CreateUserFromSaml.cs files to handle the authentication flow.
3. Build the Project
Build the project and log in to the Sitefinity CMS dashboard.
4. Configure Authentication Providers
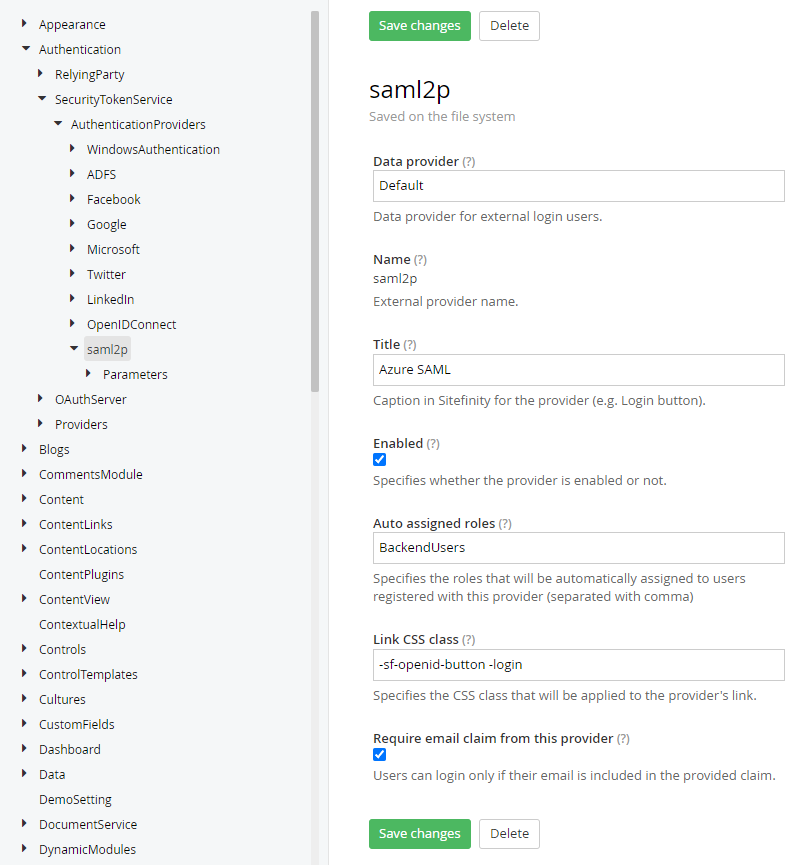
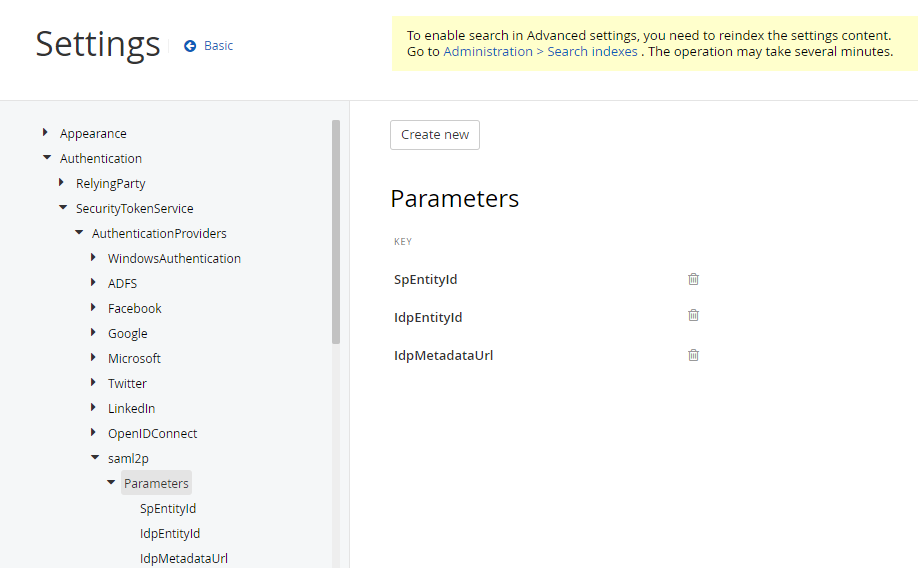
Navigate to Administration → Settings → Advanced Settings → Authentication → SecurityTokenService → AuthenticationProviders in the Sitefinity CMS and create a new provider:
- Name it saml2p and configure it as shown below:
5. Configure Parameters
Configure the following parameters for the provider:
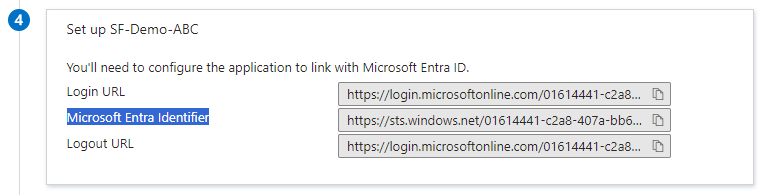
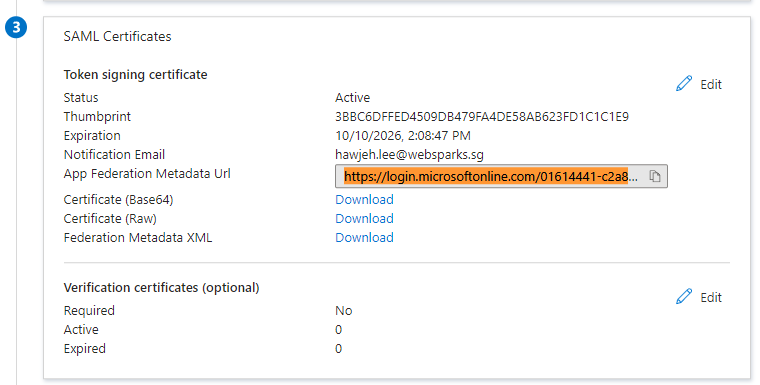
- SpEntityId: Set this to
<your domain>/Saml2(This must match the Identifier from Azure Step 3). - IdpEntityId: Use the Microsoft Entra Identifier link from Azure Step 3.
- IdpMetadataUrl: Use the App Federation Metadata URL from Azure Step 3.
6. Save and Restart
Save the changes and restart the Sitefinity instance to apply the new authentication settings.
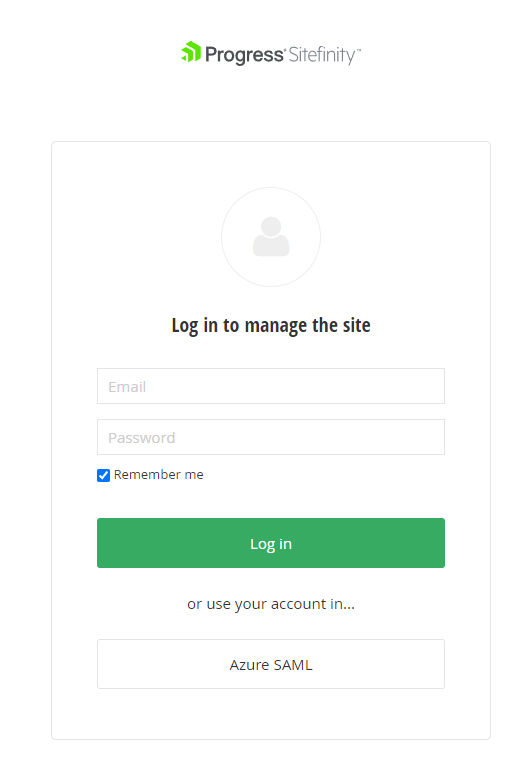
7. Access the Sitefinity Login Screen
Log out of the Sitefinity CMS and restart the application. You should now see an Azure SAML button beneath the usual login form.
8. Perform the Azure SAML Login
Click the Azure SAML button to initiate the SAML SSO login process.
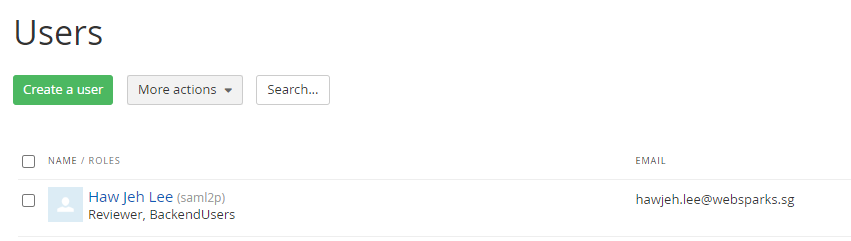
9. User Creation and Role Assignment
Once logged in via Azure SSO, the user will be automatically created in Sitefinity, and the roles assigned in Azure will be applied to the new user.
📚 References
- Microsoft - Add Application Portal Setup SSO
- Microsoft - Auth SAML
- Sitefinity - How to Configure External Login with a SAML2 Provider
- Sitefinity - Accessing Custom Claims from ADFS Provider
📦 Sample Code
You can access the sample code for this integration via GitHub Gist.