Singpass QR Login OIDC
integration | 2021-10-20
Singpass Login Integration (Might be already deprecated)
🏁 Login Flow Overview
-
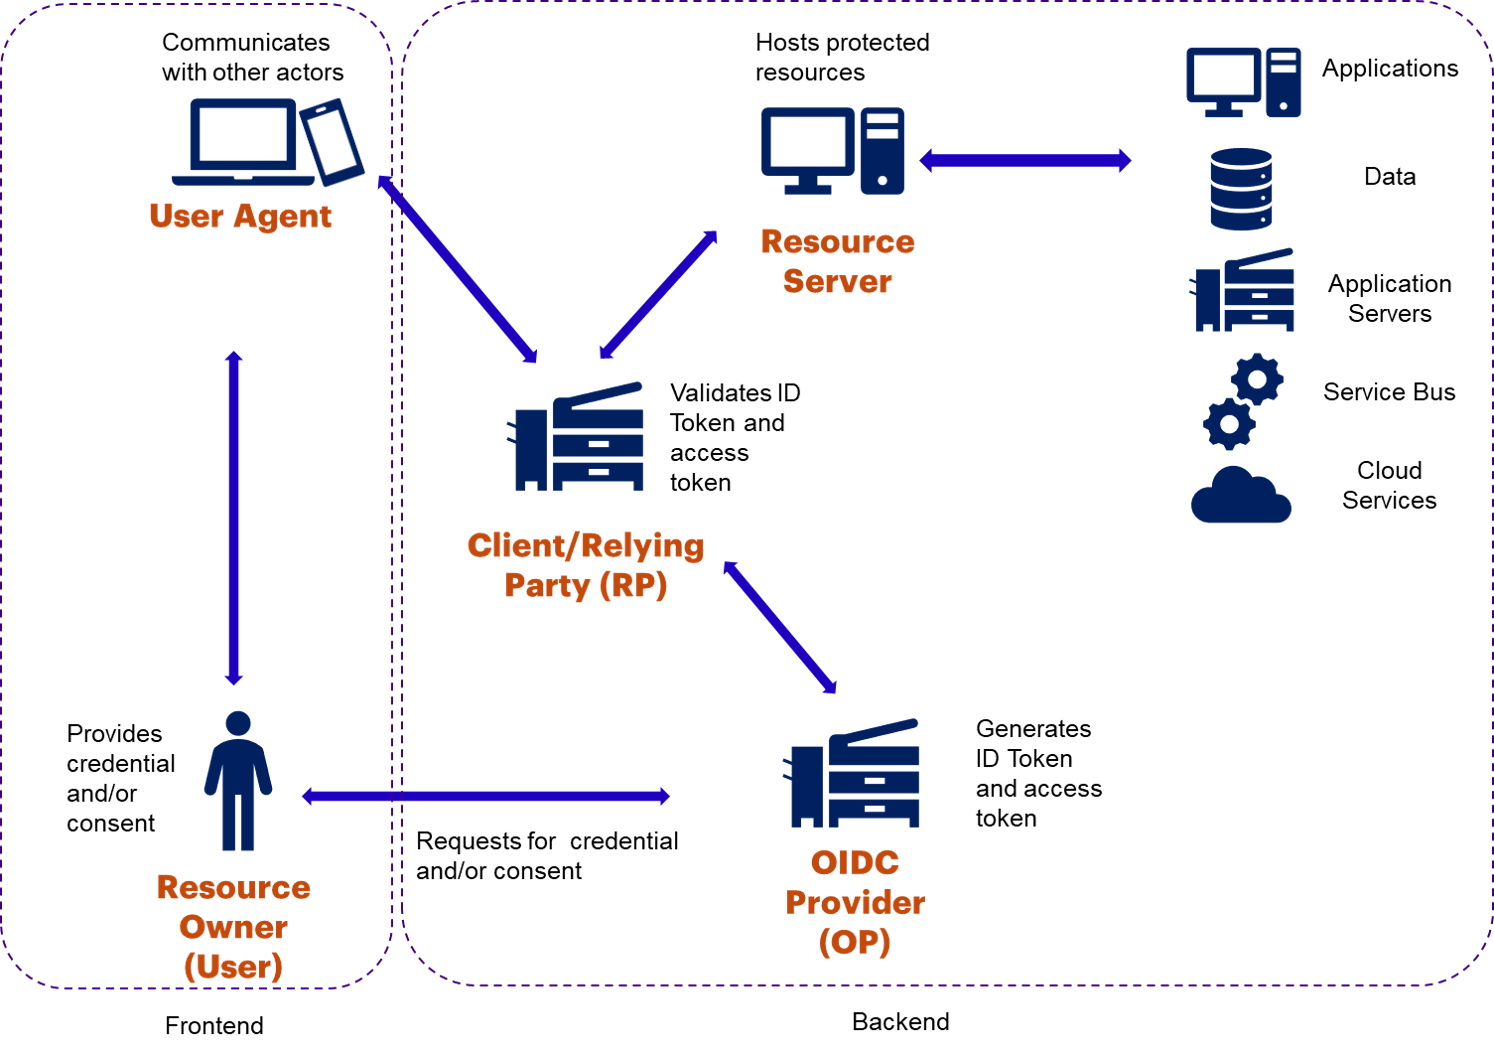
High-level Frontend/Backend Login Actors:
View Actor Diagram -
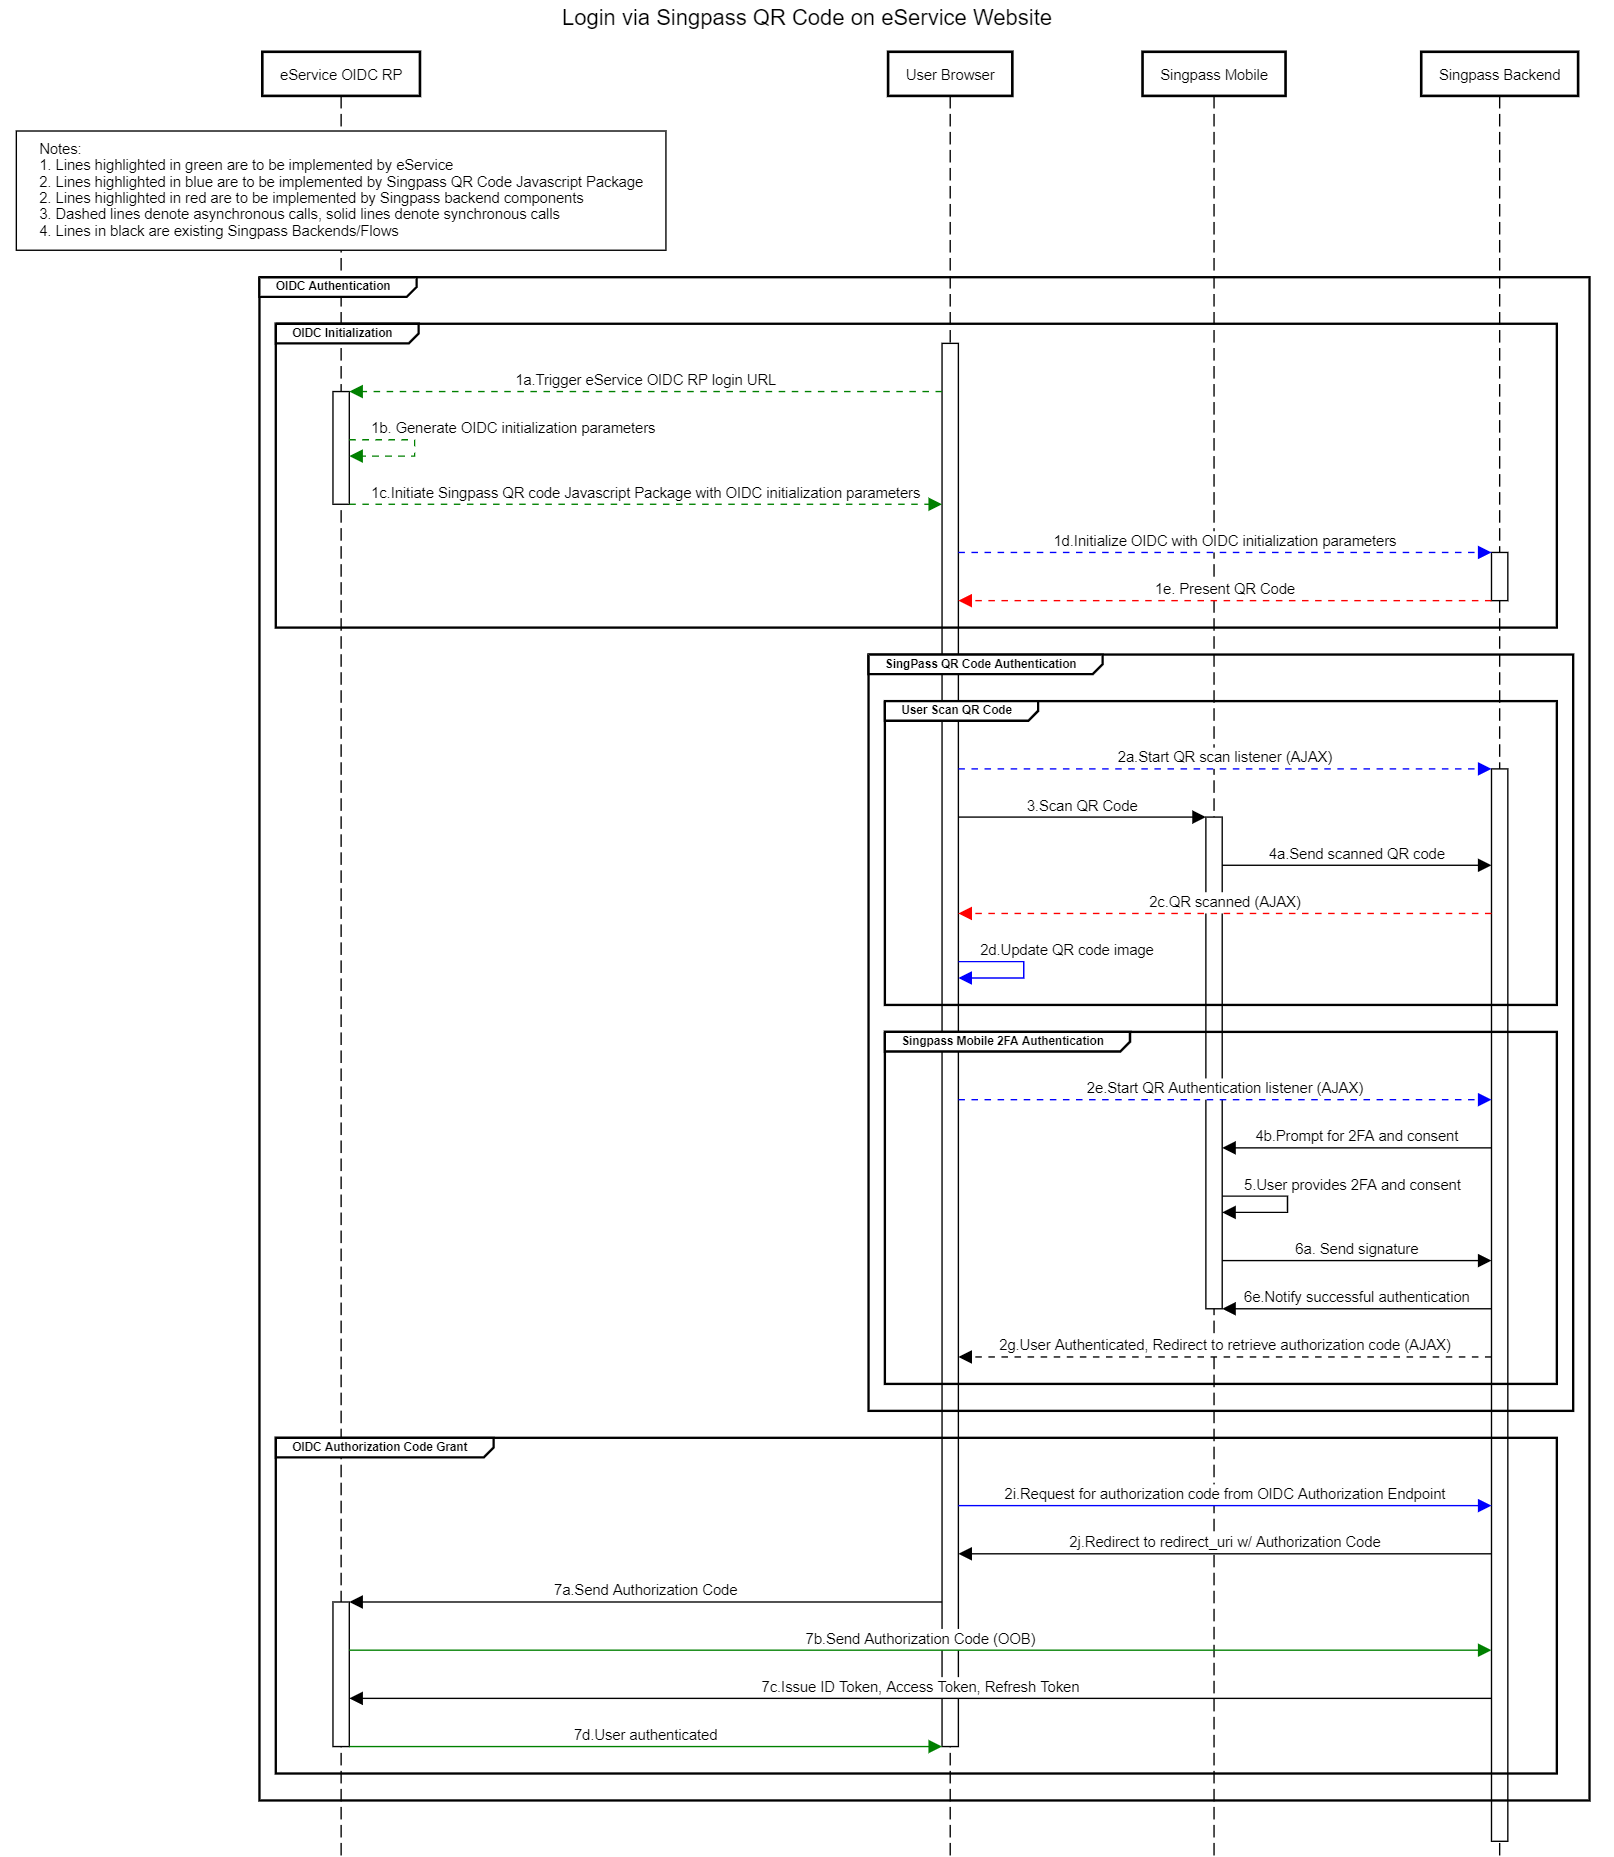
OIDC Authentication Flow:
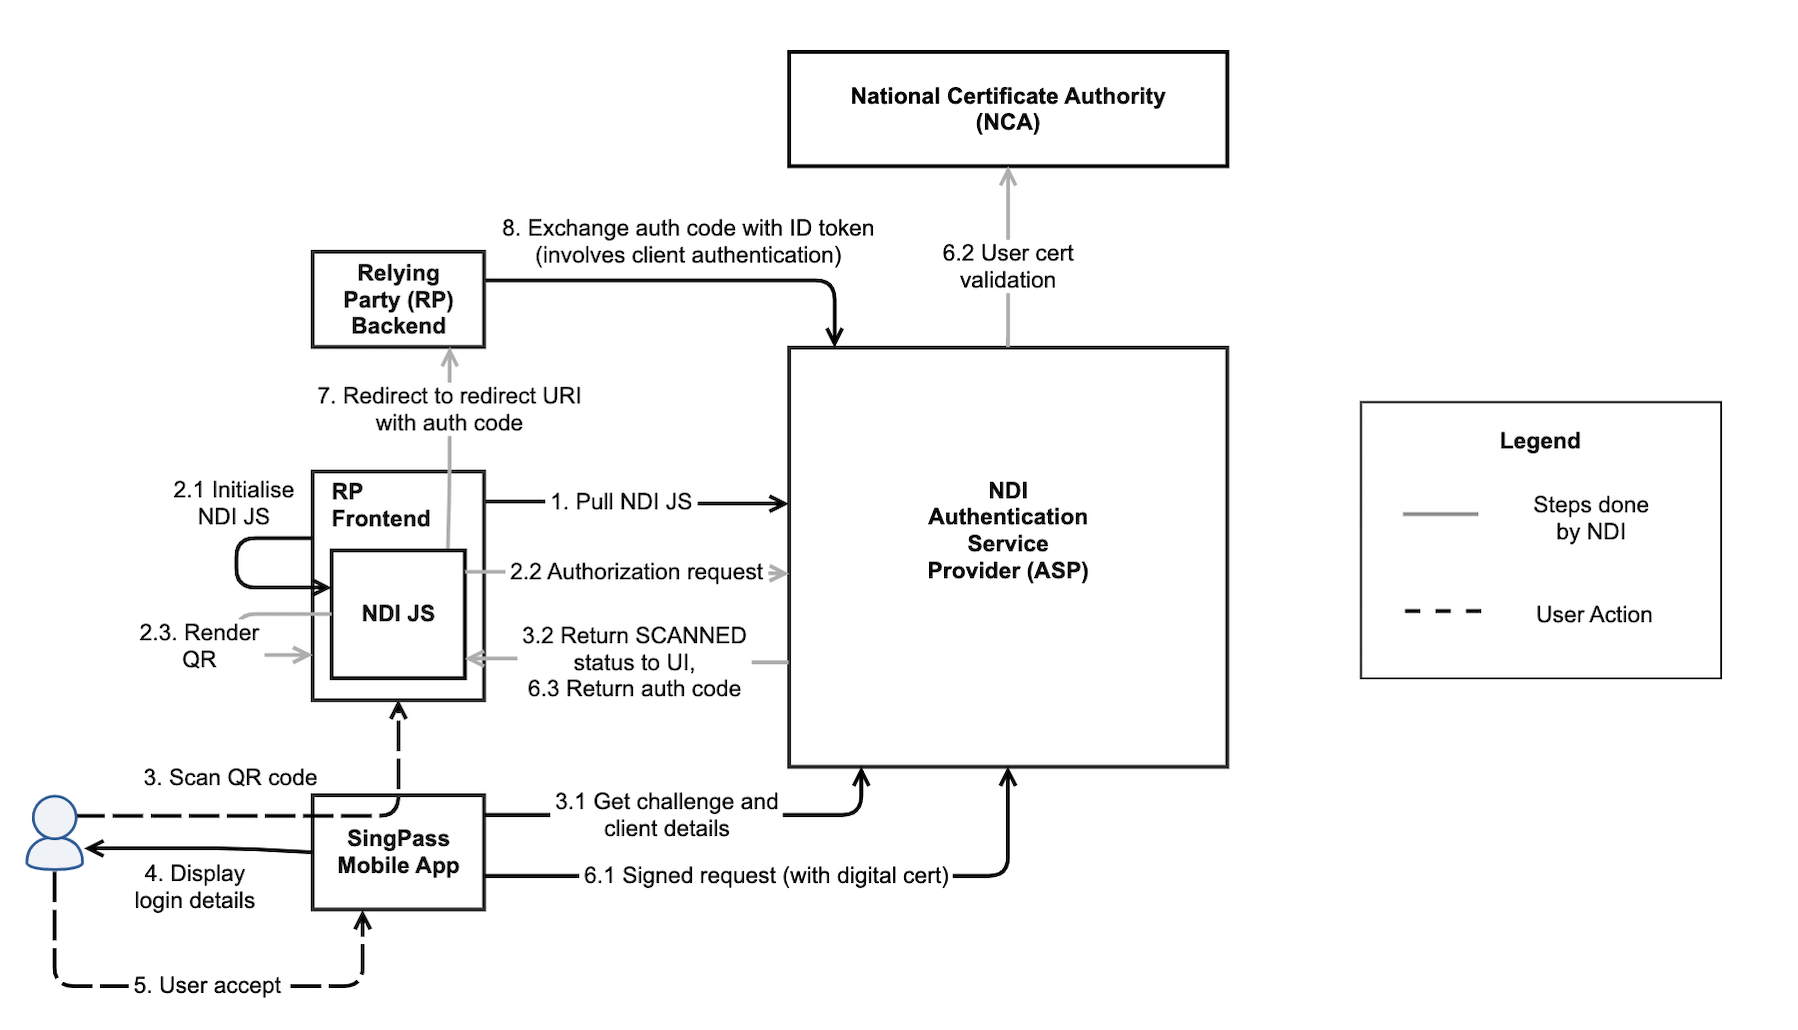
-
Detailed Sequence Diagram:
View Sequence Diagram
🚀 Onboarding with Singpass API
-
Go to Singpass API Onboarding and log in with CorpPass:
- Request integration with Login API.
- Submit application details.
-
A Singpass representative will engage you directly.
-
Singpass will provide an onboarding form requiring:
- Company Information
- Application Information
- Domain Name
- Redirect URL
- Landing URL
- JWKS Endpoint URL (see Setup JWKS Endpoints)
-
Upon approval, you will receive:
- TestFlight access.
- client_id credentials.
🔐 Setup JWKS Endpoints
The JWKS endpoint serves the public keys used to validate signatures and decrypt tokens from Singpass Identity Server.
Key Generation Commands:
# Decryption Key Pair
openssl ecparam -name prime256v1 -genkey -noout -out singpass-decryption-key.pem
openssl ec -in singpass-decryption-key.pem -pubout -out singpass-encryption-key.pem

# Signing Key Pair
openssl ecparam -name prime256v1 -genkey -noout -out singpass-signing-key.pem
openssl ec -in singpass-signing-key.pem -pubout -out singpass-verification-key.pem

# (Optional) Encrypt Private Keys
openssl ec -in singpass-decryption-key.pem -out singpass-decryption-key-encrypted.pem -aes256
openssl ec -in singpass-signing-key.pem -out singpass-signing-key-encrypted.pem -aes256
JWKS Endpoint Requirements:
- Use node-jose library to create keystores.
- Serve a keystore with two public keys:
- enc (encryption)
- sig (signature verification)
- Build an API endpoint that satisfies Singpass JWKS format requirements.
📱 QR Login Frontend Setup
Sample step / tutorial
- Singpass API Tutorial 1
- Singpass API Tutorial 2
- Singpass API Tutorial 3
- Visit here
- Sample Code
- Receive callback with code & state
Flow:
- Install TestFlight app (backup phone recommended).
- Configure:
clientIdredirectUriscoperesponseType
- Display QR code.
- Scan QR using TestFlight app.
- Callback to provided redirect URL with code and state.
🖥 Relying Party Backend Setup
Steps:
-
Build Client Assertion
- Build a JWT with required payload and sign with private key - signing-key
-
Build API to receive code and exchange for JWE (access_token, token_type and id_token)
- HTTP POST to token_endpoint with required body and headers
-
Decrypt JWE and get a JWT token
- Decrypt JWE with private key - decryption-key
- Will retrieve another encrypted JWT token
-
Verify encrypted JWT token -Verify the decrypted JWT token with Singpass public key
-
Lastly, it will return payload with sub (IC id and U id)
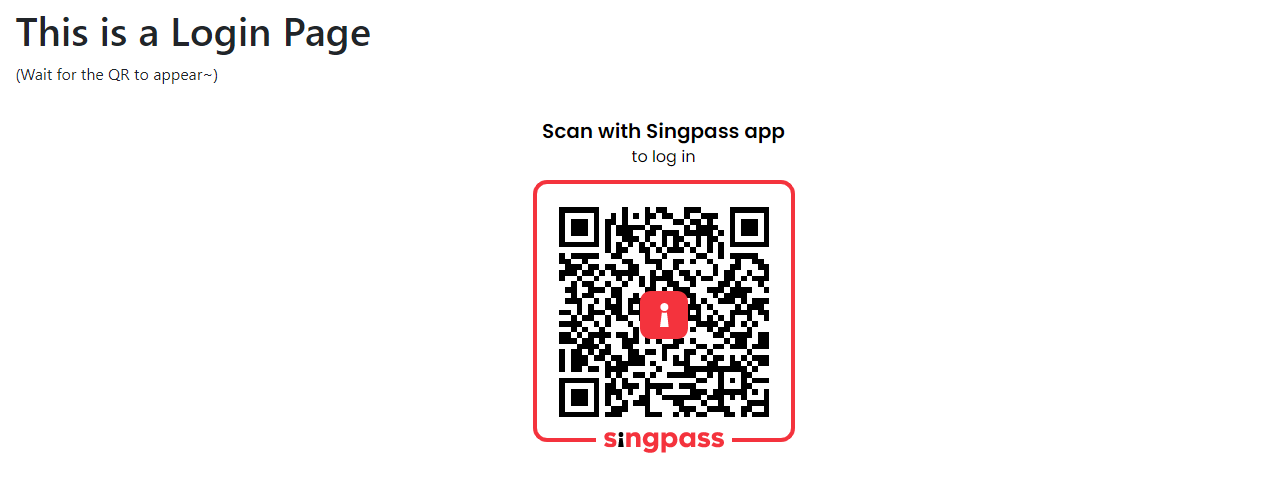
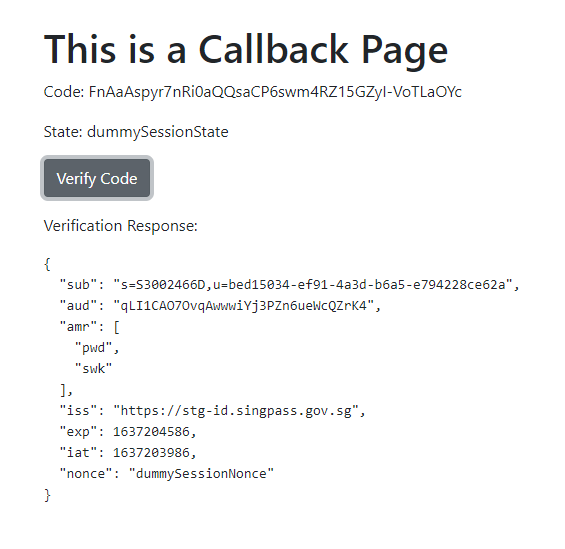
📸 Sample Screens
Login Screen
Response / Verify Screen
Scenario:
- How it works?
- I want to login using singpass
- Redirect to provider/login?callback=origin_end_point&nonce=nonce
- Scan QR code and authenticate my user
- Provider response to origin end point with base64 endcoded payload + nonce
- Origin endpoint should verify the nonce be matched with request
- Demo: Check Demo Video
- Demo in App
- Repository
- Setup widget with login role, service and callback url
- A nonce cookie generated on load - expired in 20 mins
- Click login button request to service url with callback url & nonce (Format: )
- Authentication at service site
- Callback from service site (Format: )
- Verify callback nonce with cookie value
- Create user if not exists; login user if exists
- Furthermore, check the demo video for app integration
🌟 Future Enhancements
- Integrate with myInfo service