Self Signed Certificate with PowerShell
iis | 2020-03-20
How to Host a Local Application with HTTPS on a Windows PC or Server
In this guide, we'll show you how to set up HTTPS for a local application hosted on a Windows PC or Server.
Using a self-signed SSL certificate, you can ensure secure communication for your local applications without the need for third-party certificates.
Steps to Secure Your Local Application with HTTPS
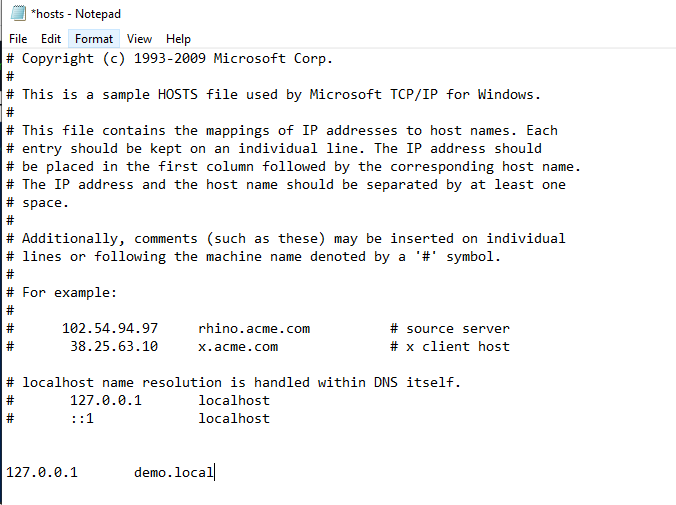
1. Add a DNS Name to the Hosts File
To start, configure a DNS name for your local application by adding it to the hosts file located at:
C:\Windows\System32\drivers\etc
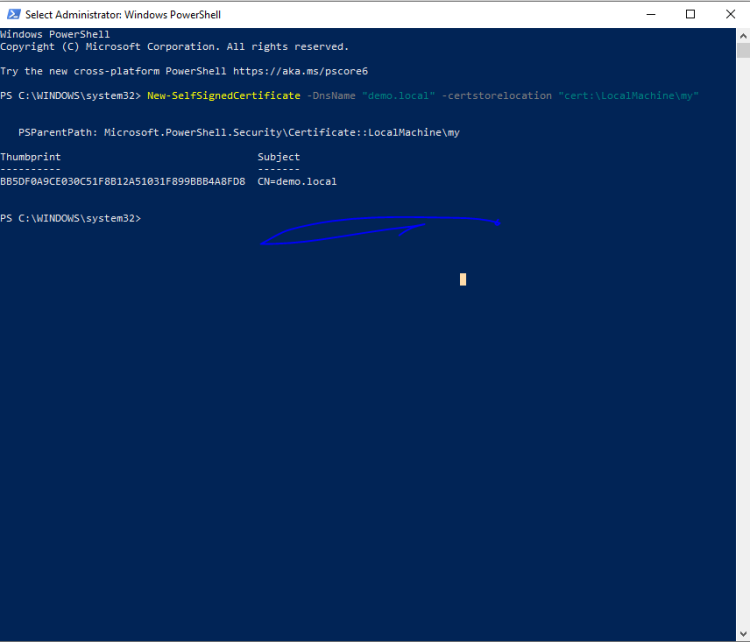
2. Run Windows PowerShell as Administrator
Next, open Windows PowerShell as an Administrator.
This ensures you have the required permissions to execute commands that affect system settings, such as generating a certificate.
3. Generate a Self-Signed SSL Certificate
In PowerShell, execute the following command to generate a self-signed SSL certificate for your local application:
New-SelfSignedCertificate -DnsName "(dns_name)" -CertStoreLocation "cert:\LocalMachine\my"
Replace (dns_name) with the DNS name you added in the hosts file (e.g., demo.local).
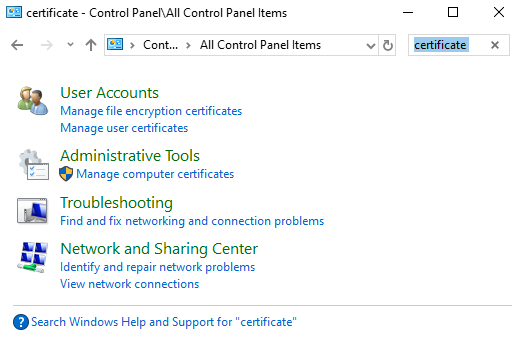
4. Open the Control Panel
Press Windows + R to open the Run dialog, type Control Panel, and press Enter.
5. Manage Computer Certificates
In the Control Panel, search for certificate in the search box and click on Manage computer certificates.
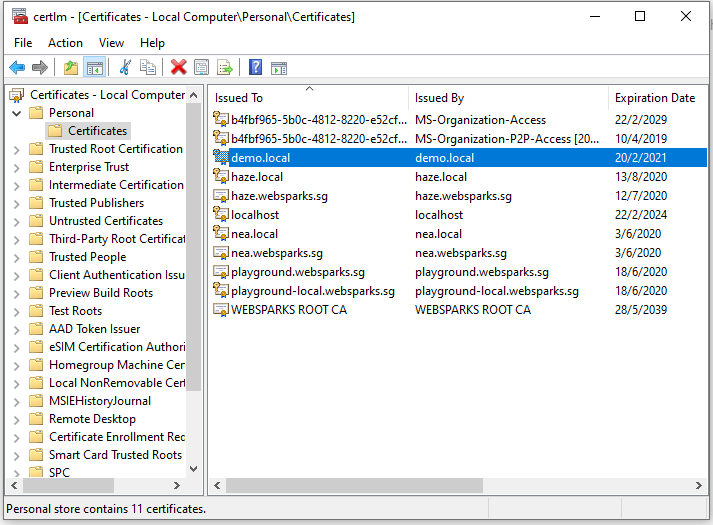
6. Locate the Generated Certificate
Navigate to Certificates – Local Computer > Personal > Certificates. Here, you will see the self-signed certificate you generated.
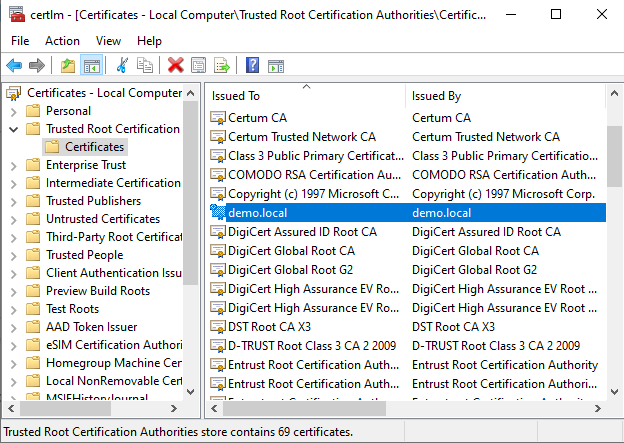
7. Add the Certificate to Trusted Root Authorities
Copy the certificate by pressing CTRL + C, then navigate to Local Computer > Trusted Root Certification Authorities > Certificates and paste the certificate by pressing CTRL + V.
8. Open IIS Manager
To configure the website for HTTPS, open IIS Manager by pressing Windows + R and typing inetmgr. Navigate to the website you want to secure.
9. Add an HTTPS Binding in IIS
In IIS Manager, open the Bindings section and add a new binding for HTTPS with the following settings:
- Type: HTTPS
- IP Address: (hosting ip address)
- Port: 443
- Host Name: Enter the DNS name (e.g.,
demo.local). - SSL Certificate: Select the self-signed certificate you created earlier.
- Require Server Name Indication: Check this option.
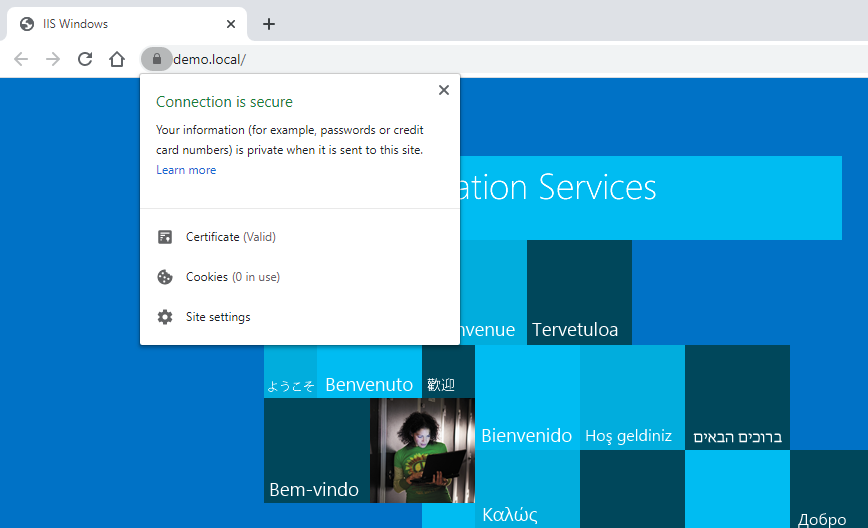
10. Test the Secure Connection
Finally, open your web browser and tadaaaa..! Connection is secure!